Securing CentOS with iptables
Read this article to get a better understanding on how to secure your CentOS with iptables.
The Cloud Raya instance control panel has its own security firewall which based on ports (TCP, UDP, and ICMP), you can manage it through the customer panel or URL https://cp.cloudraya.com/
However. In this article, we would give you the next layer for Hardening Server Security using iptables on the OS level, specifically CentOS. Securing Linux server is important to protect your data, intellectual property, from the hands of crackers (hackers) or even DDoS (Denial-of-service attack).
This Linux based firewall is controlled by the program called iptables to handles filtering for IPv4.
Prerequisites
Before we begin to the tutorial, the following are the software stack versions in this article:
- OS: Centos 7
- IPTables: v1.4.21 (Installed already by default)
- IPv4 network
Manage IPTables Firewall rule
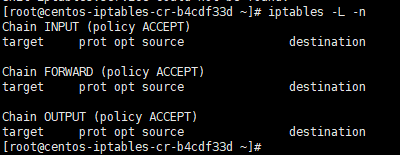
By default, IPTables is running and no rules, you can check it by executing the following command:
iptables -L -n
it will show you the following output:
[root@centos-iptables-cr-b4cdf33d ~]# iptables -L -n
Chain INPUT (policy ACCEPT)
target prot opt source destination
Chain FORWARD (policy ACCEPT)
target prot opt source destination
Chain OUTPUT (policy ACCEPT)
target prot opt source destination
The following are we mentioned some iptables which based on rules can filter high degree of illegitimate access.
# Modify this file accordingly for your specific requirement.
# 1. Delete all existing rules
iptables -F

# 2. Set default chain policies
iptables -P INPUT DROP
iptables -P FORWARD DROP
iptables -P OUTPUT DROP

# 3. Block a specific ip-address
#BLOCK_THIS_IP="x.x.x.x"
iptables -A INPUT -s "$BLOCK_THIS_IP" -j DROP

# 4. Allow ALL incoming SSH
iptables -A INPUT -i eth0 -p tcp --dport 22 -m state --state NEW,ESTABLISHED -j ACCEPT
iptables -A OUTPUT -o eth0 -p tcp --sport 22 -m state --state ESTABLISHED -j ACCEPT

# 5. Allow incoming SSH only from a sepcific network
iptables -A INPUT -i eth0 -p tcp -s 192.168.200.0/24 --dport 22 -m state --state NEW,ESTABLISHED -j ACCEPT
iptables -A OUTPUT -o eth0 -p tcp --sport 22 -m state --state ESTABLISHED -j ACCEPT

# 6. Allow incoming HTTP
iptables -A INPUT -i eth0 -p tcp --dport 80 -m state --state NEW,ESTABLISHED -j ACCEPT
iptables -A OUTPUT -o eth0 -p tcp --sport 80 -m state --state ESTABLISHED -j ACCEPT
# Allow incoming HTTPS
iptables -A INPUT -i eth0 -p tcp --dport 443 -m state --state NEW,ESTABLISHED -j ACCEPT #iptables -A OUTPUT -o eth0 -p tcp --sport 443 -m state --state ESTABLISHED -j ACCEPT

# 7. MultiPorts (Allow incoming SSH, HTTP, and HTTPS)
iptables -A INPUT -i eth0 -p tcp -m multiport --dports 22,80,443 -m state --state NEW,ESTABLISHED -j ACCEPT
iptables -A OUTPUT -o eth0 -p tcp -m multiport --sports 22,80,443 -m state --state ESTABLISHED -j ACCEPT

# 8. Allow outgoing SSH
iptables -A OUTPUT -o eth0 -p tcp --dport 22 -m state --state NEW,ESTABLISHED -j ACCEPT
iptables -A INPUT -i eth0 -p tcp --sport 22 -m state --state ESTABLISHED -j ACCEPT

# 9. Allow outgoing SSH only to a specific network
iptables -A OUTPUT -o eth0 -p tcp -d 192.168.101.0/24 --dport 22 -m state --state NEW,ESTABLISHED -j ACCEPT
iptables -A INPUT -i eth0 -p tcp --sport 22 -m state --state ESTABLISHED -j ACCEPT

# 10. Allow outgoing HTTPS
iptables -A OUTPUT -o eth0 -p tcp --dport 443 -m state --state NEW,ESTABLISHED -j ACCEPT
iptables -A INPUT -i eth0 -p tcp --sport 443 -m state --state ESTABLISHED -j ACCEPT

# 12. Ping from inside to outside
iptables -A OUTPUT -p icmp --icmp-type echo-request -j ACCEPT iptables -A INPUT -p icmp --icmp-type echo-reply -j ACCEPT

# 13. Ping from outside to inside
iptables -A INPUT -p icmp --icmp-type echo-request -j ACCEPT iptables -A OUTPUT -p icmp --icmp-type echo-reply -j ACCEPT

# 14. Allow loopback access
iptables -A INPUT -i lo -j ACCEPT iptables -A OUTPUT -o lo -j ACCEPT

# 15. Allow packets from internal network to reach external network.
# if eth1 is connected to external network (internet)
# if eth0 is connected to internal network (192.168.1.x)
iptables -A FORWARD -i eth0 -o eth1 -j ACCEPT

# 16. Allow outbound DNS
#iptables -A OUTPUT -p udp -o eth0 --dport 53 -j ACCEPT
#iptables -A INPUT -p udp -i eth0 --sport 53 -j ACCEPT

# 18. Allow rsync from a specific network
iptables -A INPUT -i eth0 -p tcp -s 192.168.101.0/24 --dport 873 -m state --state NEW,ESTABLISHED -j ACCEPT
iptables -A OUTPUT -o eth0 -p tcp --sport 873 -m state --state ESTABLISHED -j ACCEPT

# 19. Allow MySQL connection only from a specific network iptables -A INPUT -i eth0 -p tcp -s 192.168.200.0/24 --dport 3306 -m state --state NEW,ESTABLISHED -j ACCEPT
iptables -A OUTPUT -o eth0 -p tcp --sport 3306 -m state --state ESTABLISHED -j ACCEPT

# 20. Allow Sendmail or Postfix
iptables -A INPUT -i eth0 -p tcp --dport 25 -m state --state NEW,ESTABLISHED -j ACCEPT
iptables -A OUTPUT -o eth0 -p tcp --sport 25 -m state --state ESTABLISHED -j ACCEPT

# 21. Allow IMAP and IMAPS
iptables -A INPUT -i eth0 -p tcp --dport 143 -m state --state NEW,ESTABLISHED -j ACCEPT
iptables -A OUTPUT -o eth0 -p tcp --sport 143 -m state --state ESTABLISHED -j ACCEPT
iptables -A INPUT -i eth0 -p tcp --dport 993 -m state --state NEW,ESTABLISHED -j ACCEPT
iptables -A OUTPUT -o eth0 -p tcp --sport 993 -m state --state ESTABLISHED -j ACCEPT

# 22. Allow POP3 and POP3S
iptables -A INPUT -i eth0 -p tcp --dport 110 -m state --state NEW,ESTABLISHED -j ACCEPT
iptables -A OUTPUT -o eth0 -p tcp --sport 110 -m state --state ESTABLISHED -j ACCEPT
iptables -A INPUT -i eth0 -p tcp --dport 995 -m state --state NEW,ESTABLISHED -j ACCEPT
iptables -A OUTPUT -o eth0 -p tcp --sport 995 -m state --state ESTABLISHED -j ACCEPT

# 23. Prevent DoS attack
iptables -A INPUT -p tcp --dport 80 -m limit --limit 25/minute --limit-burst 100 -j ACCEPT

# 24. Port forwarding 80 to 8080
iptables -t nat -A PREROUTING -p tcp --dport 80 -j REDIRECT --to-port 8080

# 25. Log dropped packets
iptables -N LOGGING iptables -A INPUT -j LOGGING
iptables -A LOGGING -m limit --limit 2/min -j LOG --log-prefix "IPTables Packet Dropped: " --log-level 7
iptables -A LOGGING -j DROP
Manage IPTables Firewall rule (continue)
Furthermore, We can then add a few simple firewall rules to block the most common attacks, to protect our instance in Cloudraya from script-kiddies. We can’t really count on iptables alone to protect our instances from a full-scale DDOS or similar, but we can at least put off the usual network scanning bots that will eventually find our instances and start looking for security holes to exploit.
First of all, we start with blocking null packets.
iptables -A INPUT -p tcp --tcp-flags ALL NONE -j DROP

We told the firewall to take all incoming packets with TCP flags NONE and just DROP them all. Null packets are simply said recon packets. The attack patterns use these to try and see how we configured the Instances and find out weaknesses.
Fragmented Packet:
iptables -A INPUT -f -j DROP

All packets with incoming fragments drop them. This attack result in Linux server panic such data loss.
Force SYN Packet Check:
iptables -A INPUT -p tcp ! --syn -m state --state NEW -j DROP

Ensure all NEW incoming TCP connections are SYN packets. Otherwise, we need to drop them, SYN-Flood-Attacks means that the attackers open a new connection, but does not state what they want (ie. SYN, ACK, whatever). They just want to take up our servers’ resources. We won’t accept such packages.
XMAS Packet:
iptables -A INPUT -p tcp --tcp-flags ALL ALL -j DROP

All incoming malformed XMAS packets should be dropped, XMAS packets is also a recon packet.
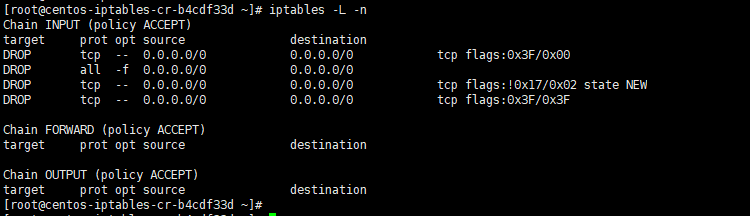
The following are all rules above that we have added (blocking null packets, Fragmented Packet, Force SYN Packet Check and XMAS Packet).
[root@centos-iptables-cr-b4cdf33d ~]# iptables -L -n
Chain INPUT (policy ACCEPT)
target prot opt source destination
DROP tcp -- 0.0.0.0/0 0.0.0.0/0 tcp flags:0x3F/0x00
DROP all -f 0.0.0.0/0 0.0.0.0/0
DROP tcp -- 0.0.0.0/0 0.0.0.0/0 tcp flags:!0x17/0x02 state NEW
DROP tcp -- 0.0.0.0/0 0.0.0.0/0 tcp flags:0x3F/0x3F
Chain FORWARD (policy ACCEPT)
target prot opt source destination
Chain OUTPUT (policy ACCEPT)
target prot opt source destination
We also recommend you to install and use sniffer such as tcpdump and ngrep to test your firewall settings
Conclusion
This article only lists basic rules for new Linux users. You can create/custom and build more complex rules. This requires a good understanding of TCP/IP, Linux kernel tuning via sysctl.conf, and good knowledge of your own setup.
Hope this helps and see you in the next article.