How to Setup Active Directory Domain Service & DNS with Cloud Raya
This article will explain how to setup Active Directory Domain Service (ADDS) & DNS in Cloud Raya. In order to do so, let’s jump into the tutorials.
Overview
Windows Active Directory or you might called Active Directory Domain Services (ADDS) is main controller for windows system network. Accordingly, it will store information about object on the network. Meanwhile, Domain Name Server (DNS) is the one part of services that can support Active Directory working well.
Active Directory stores information about user account, password, phone number, policy, computer and so on. It will allow administrator to manage or custom privilege for each user, group or division also define privilege between view, update, or even add and delete. In addition, Domain Name Server will help Client Active Directory to translate from domain to IP Address.
Similar to other cloud services, Cloud Raya has the ability to build Windows Active Directory on cloud in just a couple of minutes. Accordingly, we will describe how to prepare and build your Active Directory for your network.
Preparation
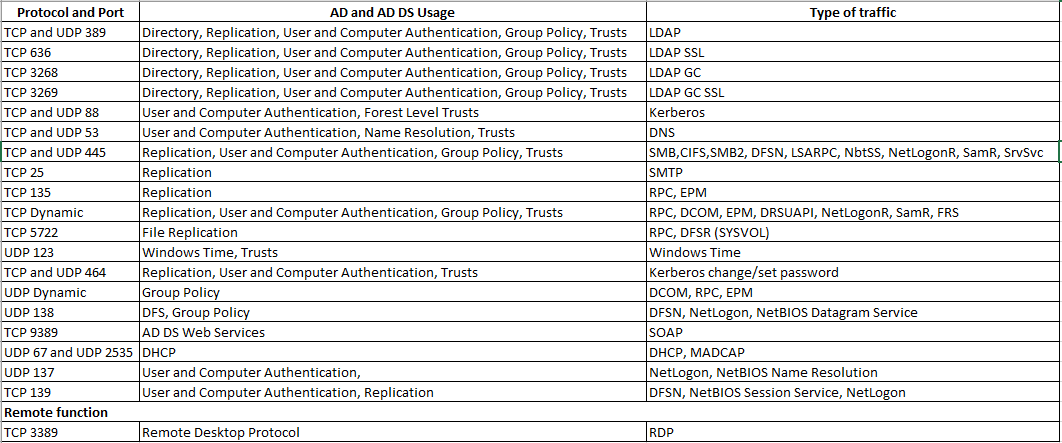
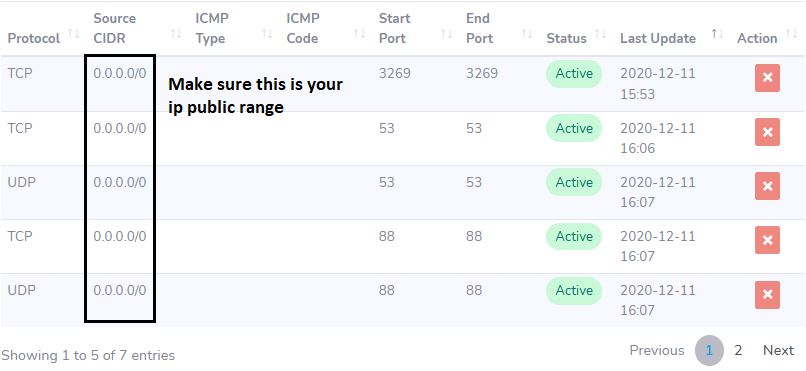
1. Setup Security Profile for your instance. Firstly, use the table below to referring port you work with and make sure open the port only for specific your ip public range.
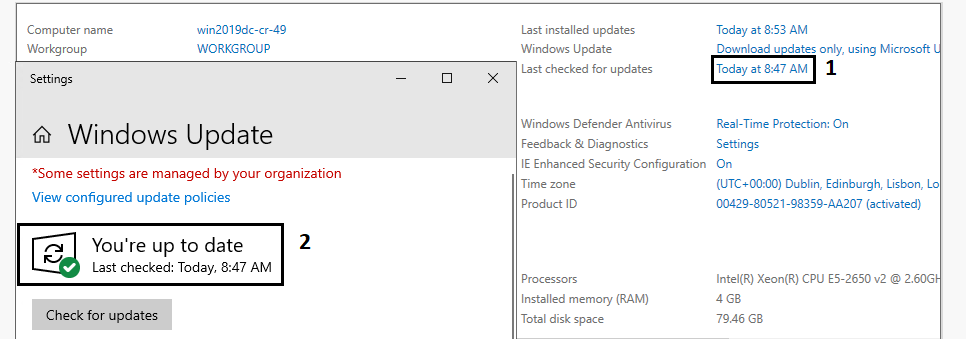
2. Make sure your windows server is up to date for the security patch by checking Server Manager > Local manager, several reboot might needed due to apply security patch.
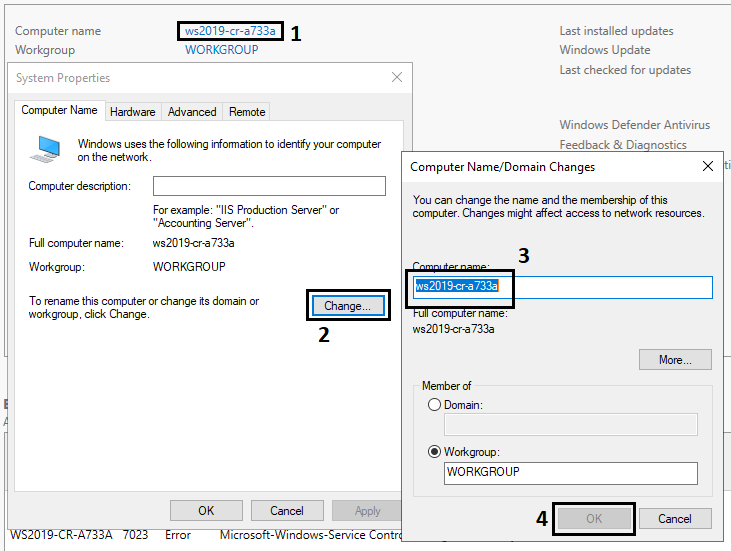
3. Usually, Cloud Raya will generate hostname each time it creates a new VM. Now, it is your turn to rename hostname of your server to identity your server. Also, reboot is required. Follow picture below to rename your server.
Installation: Active Directory Domain Services and features
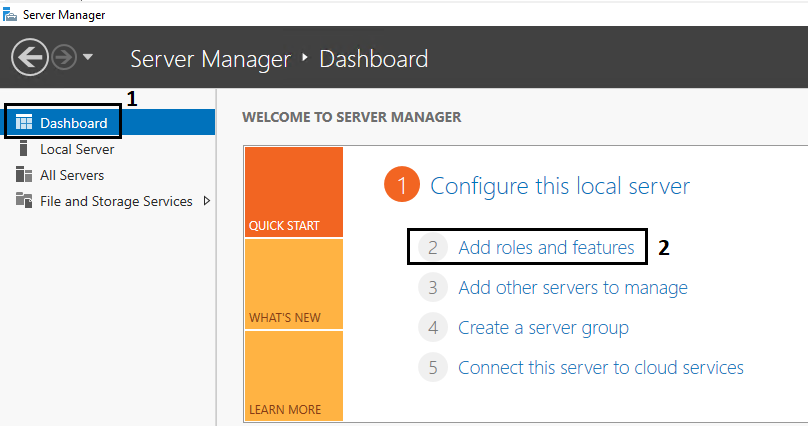
1. Once your server is up,it should be ready to install Active Directory Domain Service, go to Server Manager App and click Dashboard > Add roles and feature.
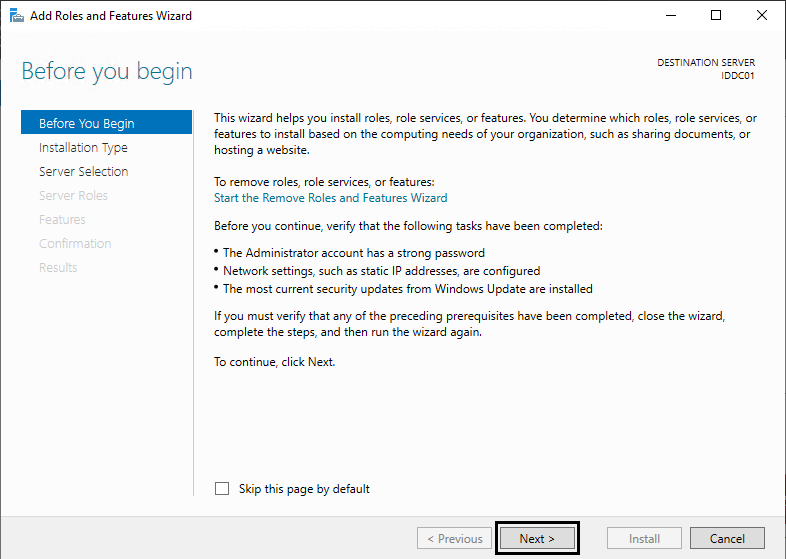
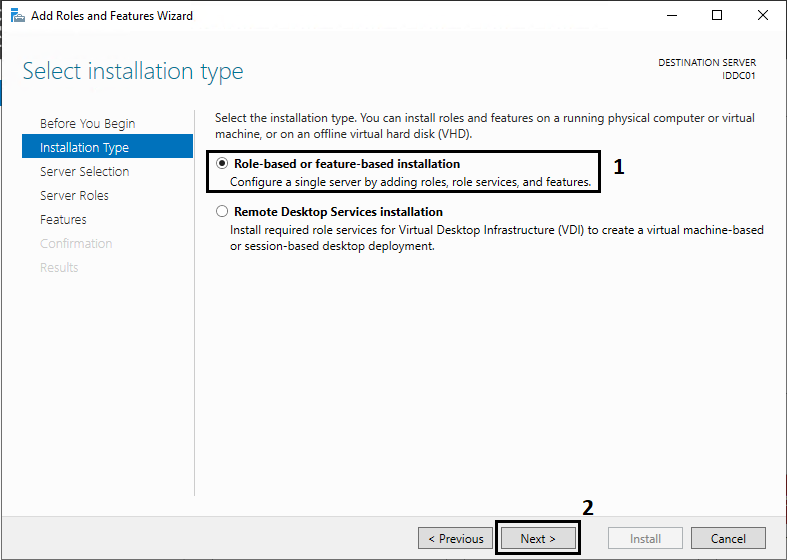
2. After you click “Add roles and features”, there will be open dialog. You can skip notification page “Before you begin” by pressing next button. On installation type chose “Role-based or features-based installation” then press next.
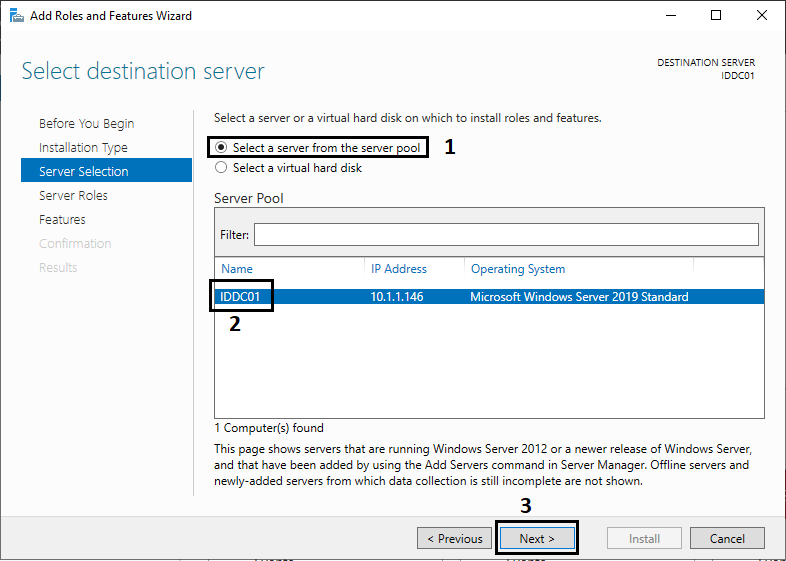
3. On Select destination server page make sure to choose “Select a server from the server pool” then select destination server then press Next.
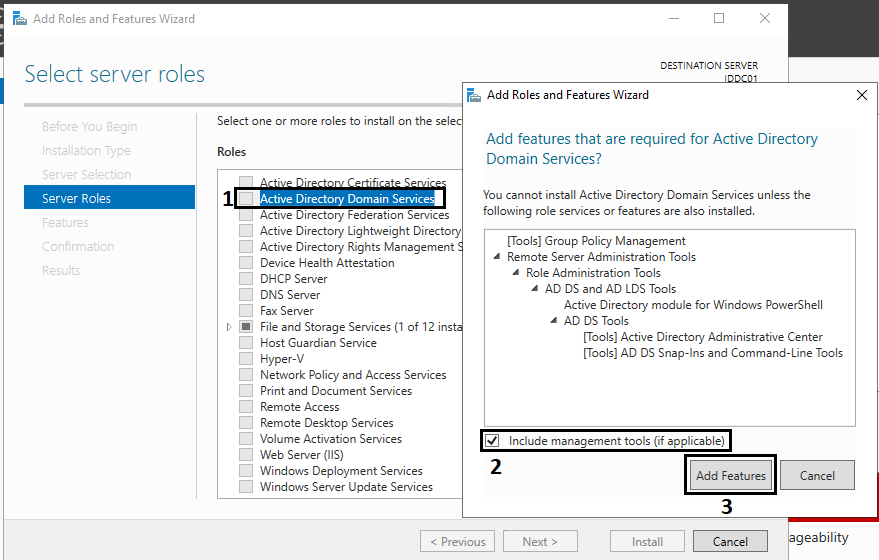
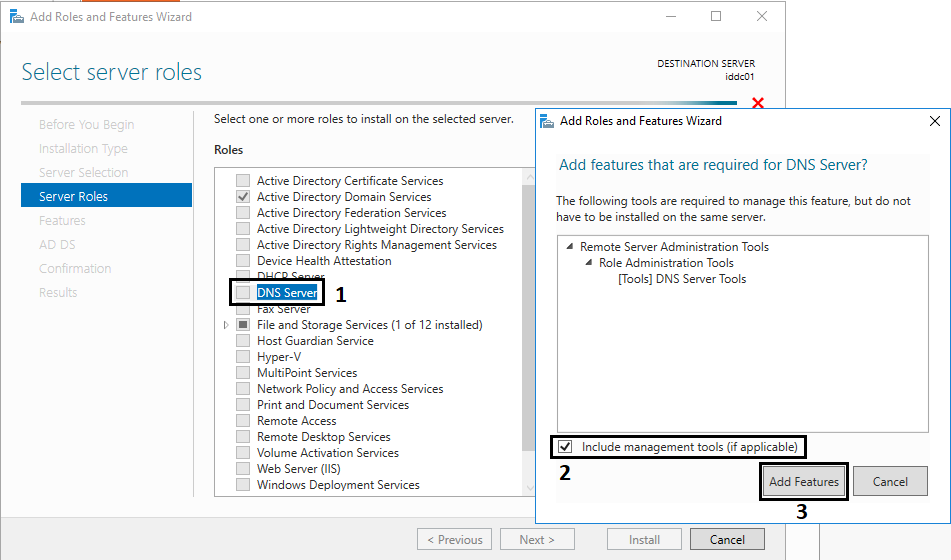
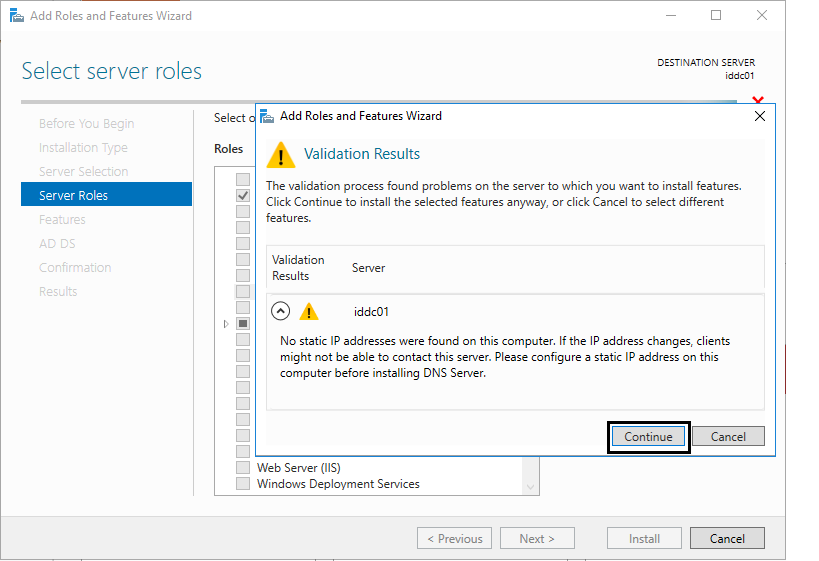
4. Then, on Server Roles page, choose Active Directory Domain Service and DNS. After that, there will be notification that you have to set static ip for your server. This is common since your server stand behind Cloud Raya Firewall and couldn’t detect your static ip public, just keep going by click continue button. Then, follow instruction below.
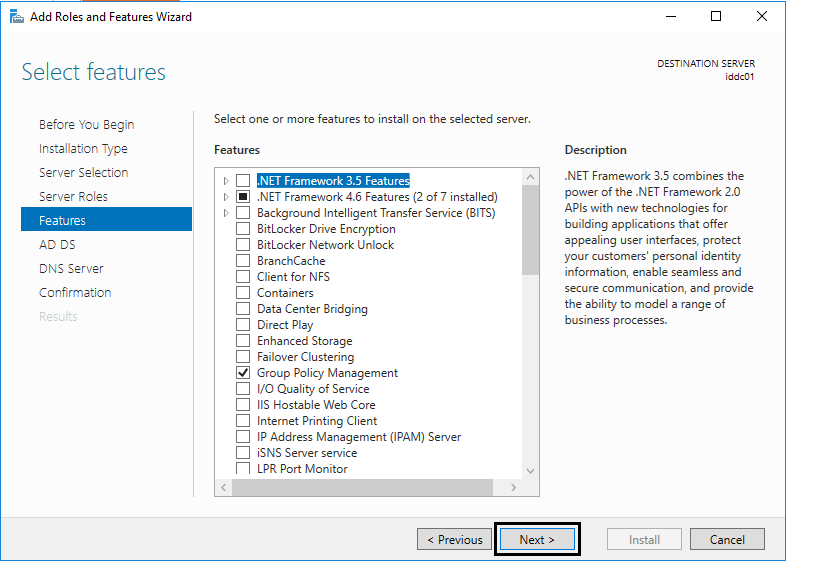
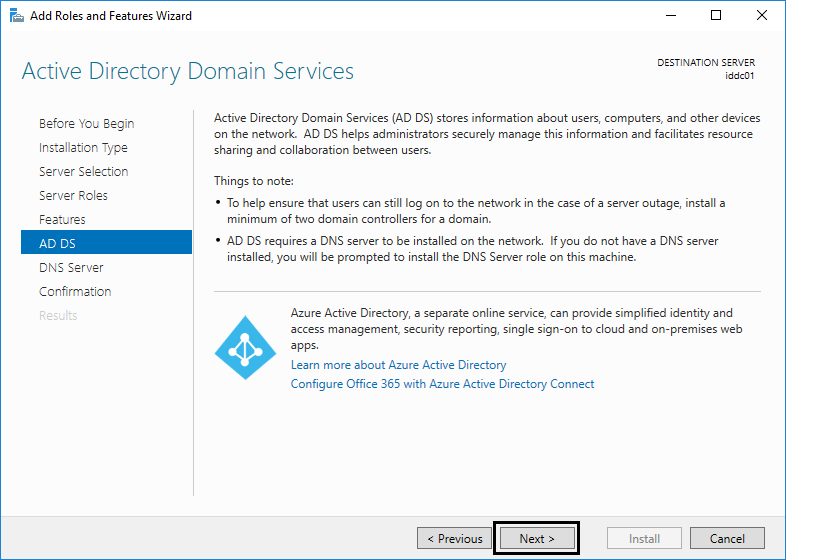
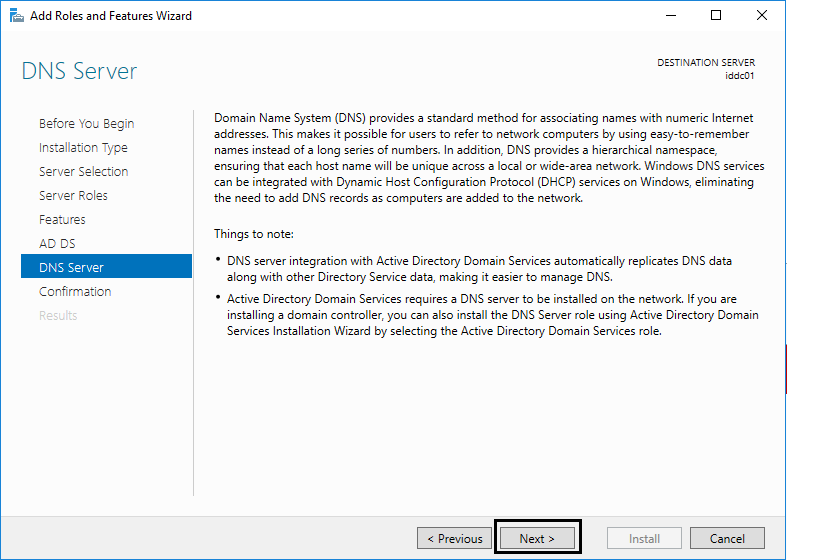
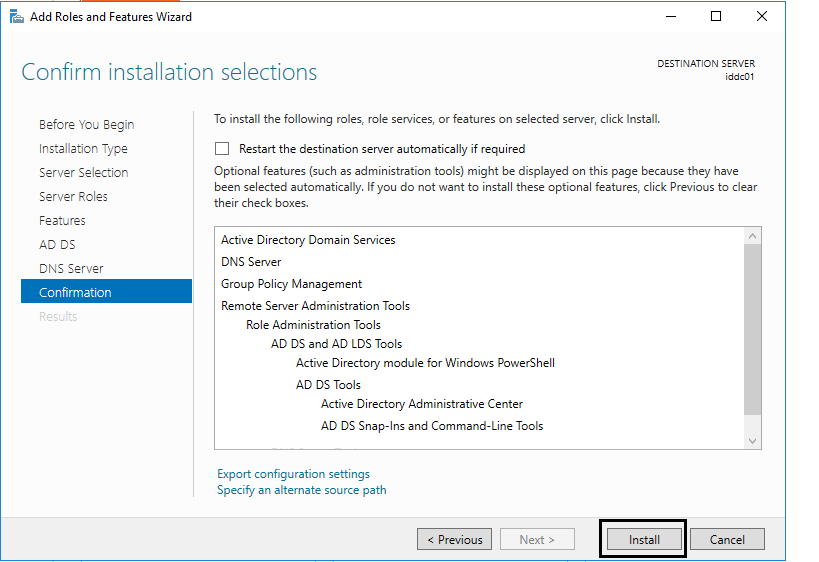
5. After that, the next window will give you a brief description about ADDS & DNS services. Click next to proceed and click install to start the installation, once installation completes The server is ready to promote as domain controller.
Power Shell
If you prefer working with Power Shell, you could use command below to install Active Directory Service in one line via Power Shell command line
Install-WindowsFeature -name AD-Domain-Services DNS -IncludeManagementTools
Configuration
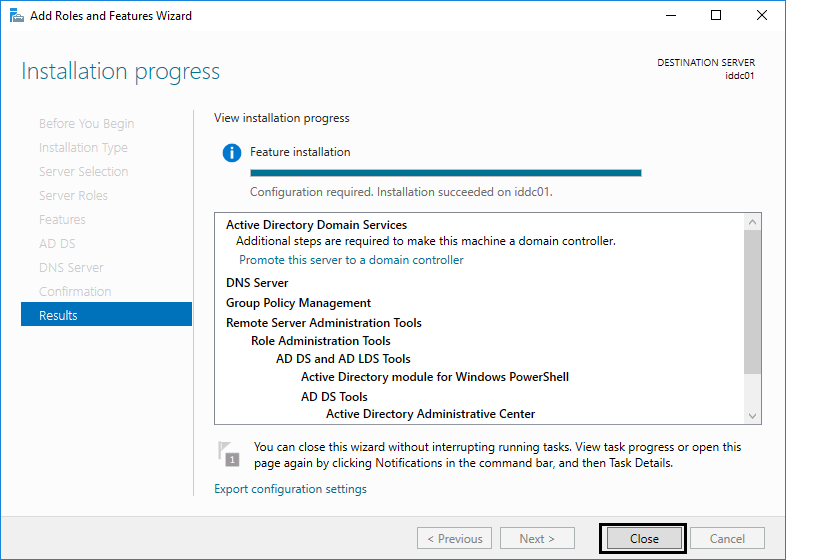
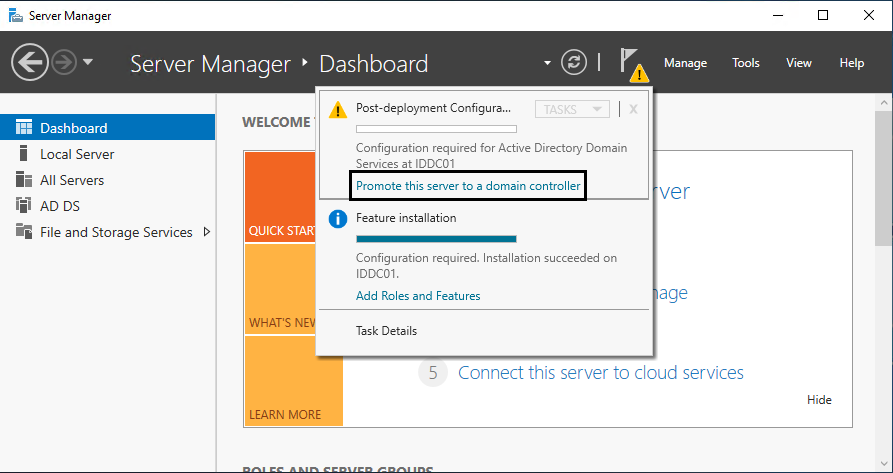
1. After installation process we will start to promoting the server as Active Directory, go to your Server manager and you will see exclamation mark on the top click on it then click “Promote this server to a domain controller” there will be open dialog regarding deployment configuration your Active Directory
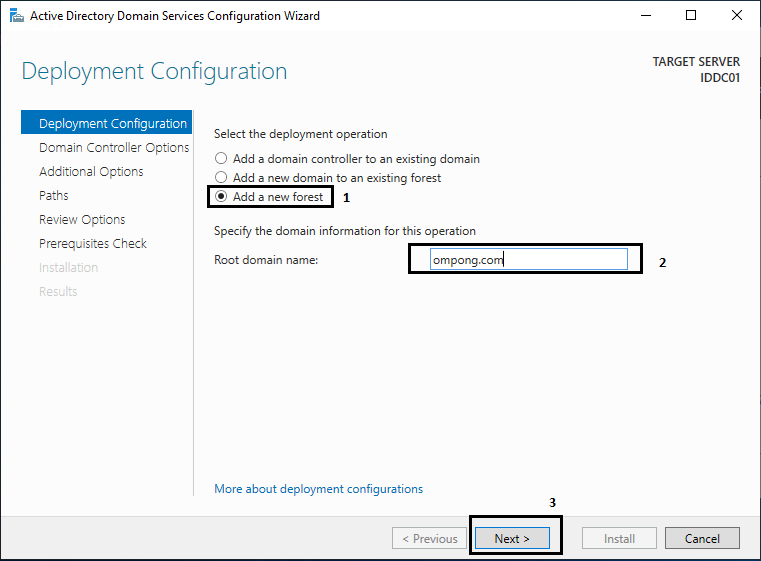
2 . Now you will see 3 options which type of installation active directory are your gone chose, currently we will use last option “Add a new forest” then type in your domain name in separate field, click next once you finish type in your domain name.
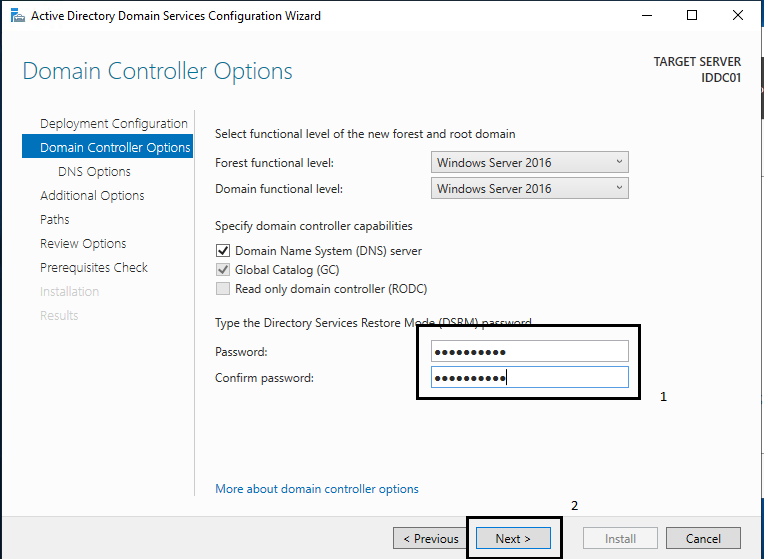
3. Now you will see “Domain Controller Option” in this page there is several option we will leave it as is. Don’t forget to type in DSRM password, then press Next.
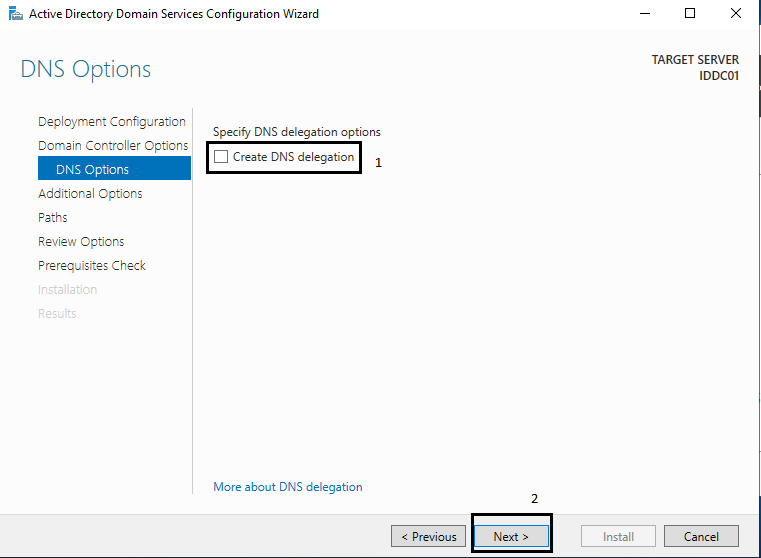
4. Uncheck Create DNS delegation in “DNS Option” page then click Next
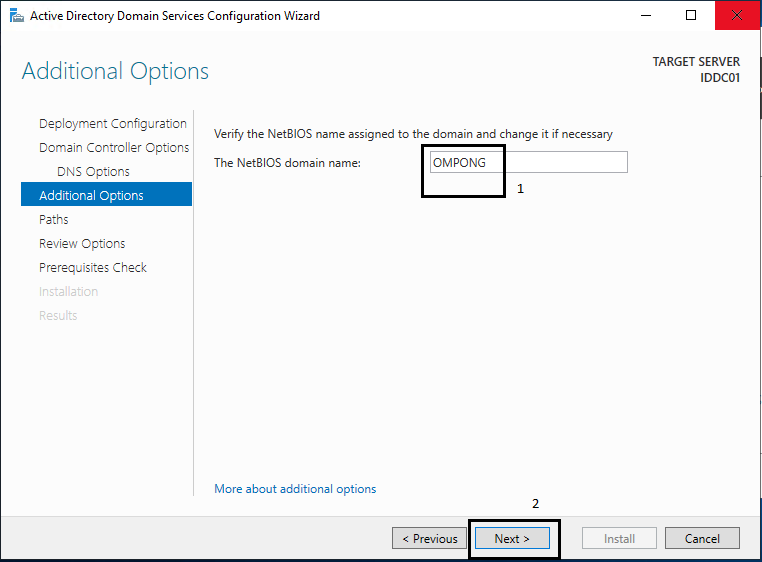
5. In “Additional Option” you can change your NetBIOS as your wish then click Next.
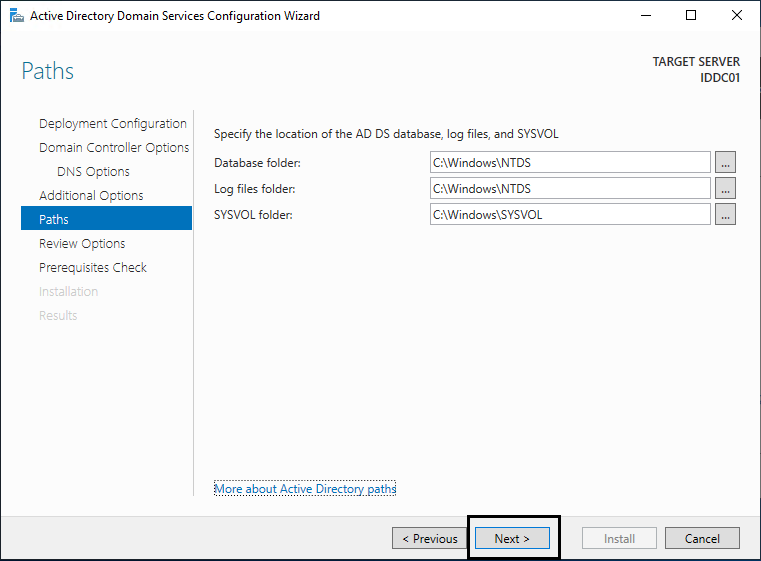
6. In “Paths” Page there will be several information which define NTDS, SYSVOL and LOG are located, we will keep it as default then press Next.
7. Next page will give the option to review the configuration changes. If everything okay you can click next to proceed or otherwise can go back and change the settings.

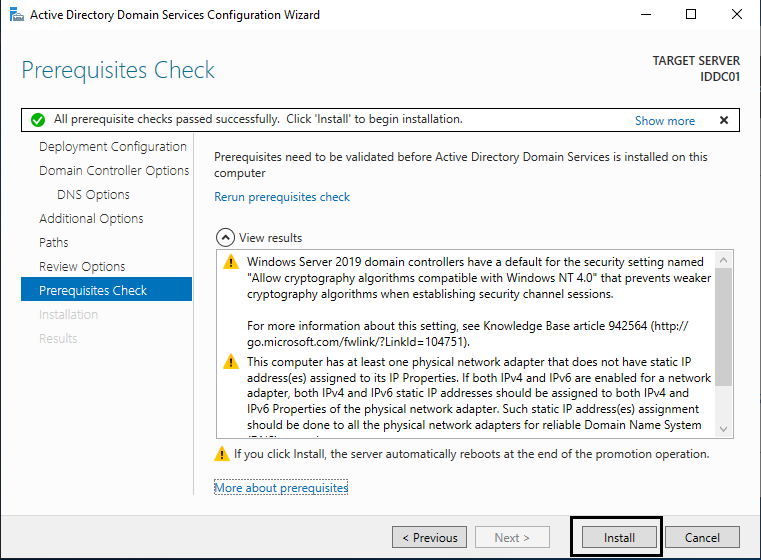
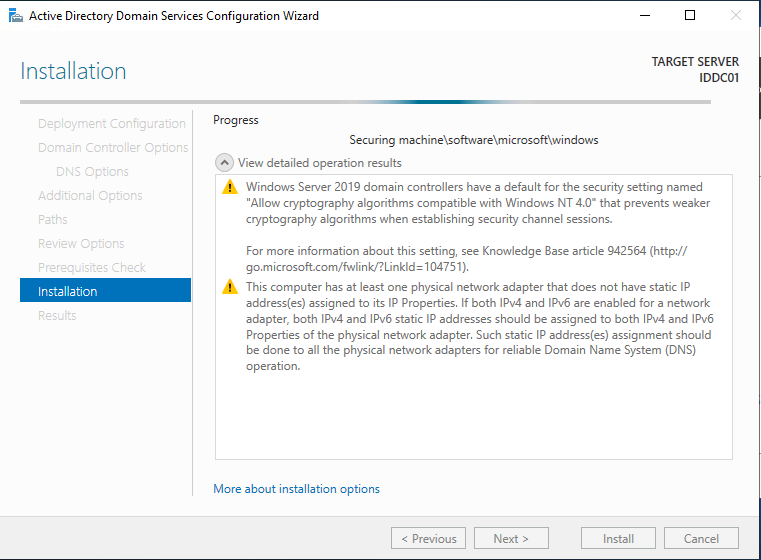
8. In this page installer will do prequisites check before running installation, after all prerequisites check are passed you can click install to begin installation.
Power Shell
If you more prefer work with Power Shell you could use command below to install Active Directory Service in one line via Power Shell command line
Import-Module ADDSDeployment Install-ADDSForest -CreateDnsDelegation:$false -DatabasePath "C:\Windows\NTDS" -DomainMode "WinThreshold" -DomainName "ompong.com" -DomainNetbiosName "OMPONG" -ForestMode "WinThreshold" -InstallDns:$true -LogPath "C:\Windows\NTDS" -NoRebootOnCompletion:$false -SysvolPath "C:\Windows\SYSVOL" -Force:$true