Installing Multiple PHP Versions in One VM for More Flexible Web Development
Sometimes, when we want to install the desired PHP Versions, it is not compatible with what is available in the default Ubuntu repository. For example, the repository for Ubuntu 20.04 only provides PHP7.4, while the repository for Ubuntu 22.04 only provides PHP8.1.
Such a situation pushes us to find an alternative source to get the desired PHP installation package. One option you can do is to use PPA (Personal Package Archive). PPA is a place where software developer stores their software to be downloaded.
For example, the Ubuntu 22.04 default repository does not provide PHP other than the 8.1 version. Thus, if you try to find other versions of PHP, you will never find them.
With PPA from Ondřej Surý, a Debian developer, you can access other versions of PHP and install it in your Ubuntu. PPA provides access to other versions of PHP that is not available in the Ubuntu default repository.
The following is a tutorial to install PHP5.6, PHP7.4, and PHP8.0 in one VM with Ubuntu OS using the NGINX web server. We will also give you details steps on how to change the PHP version to your needs.
Pre-instalation
First, add Ondřej Surý PPA for PHP to your Ubuntu system with the following command.
# sudo add-apt-repository ppa:ondrej/php
Then, refresh your package list with the following command.
# sudo apt update
Multiple PHP Version Installation Through PPA
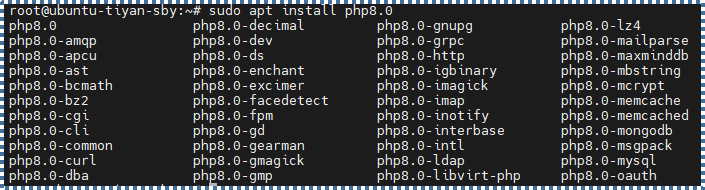
Now, let’s try to install PHP8.0 into the Ubuntu VM. Run the following command to install PHP8.0, PHP8.0 FPM, and several PHP8.0 extensions commonly used in developing web applications.
# sudo apt install php8.0 php8.0-fpm php8.0-mysql php8.0-mbstring php8.0-xml php8.0-gd php8.0-curl
You can check other extensions available in PHP8.0 by running the command sudo apt install php8.0 and then pressing Tab twice.
Now, let’s install PHP7.4 in the Ubuntu VM. Run the following command to install PHP7.4 and its extensions.
# sudo apt install php7.4 php7.4-fpm php7.4-mysql php7.4-mbstring php7.4-xml php7.4-gd php7.4-curl
Lastly, let’s install PHP5.6 in the Ubuntu VM. Run the following command to install PHP 5.6 with its extensions.
# sudo apt install php5.6 php5.6-fpm php5.6-mysql php5.6-mbstring php5.6-xml php5.6-gd php5.6-curl
To install other PHP versions, you only need to change the version number within the command.
Switching the PHP Version in NGINX Server Block
Switching the PHP version through the NGINX server block is very easy. Look up the PHP-FPM socket files list (.sock) in the VM with the following command:
# ls /run/php/
You can see all of the PHP version you previously installed.

Now, let’s edit the NGINX server block configuration. By default, the server block configuration file can be found in the default directory, which is/etc/nginx/sites-available/default. However, in this tutorial, we have changed the location to /etc/nginx/sites-available/cloudforindonesia
You can find the PHP version NGINX currently uses in the following line.
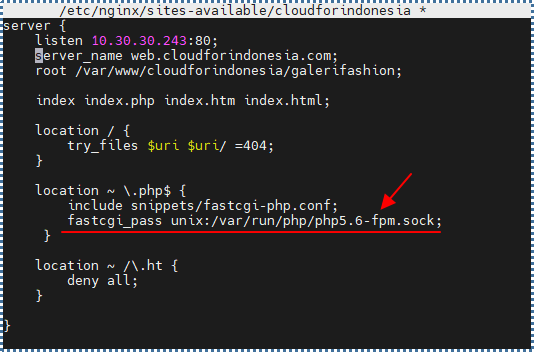
To change the PHP version, you need to change that line with the one from other versions listed in PHP-FPM socket files (.sock).
If you have changed the line, close the file editor and reload the NGINX service to apply the changes.
# sudo systemctl reload nginx
Testing the PHP Version in NGINX Server Block
There are several ways we can test the PHP version used by the NGINX server. The easiest one to do is to create a new file called info.php in our website directory.
# sudo nano /var/www/cloudforindonesia/galerifashion/info.php
Insert the following PHP code into the file.
<?php phpinfo(); ?>
Save and close the editor, and then access your file through the browser.
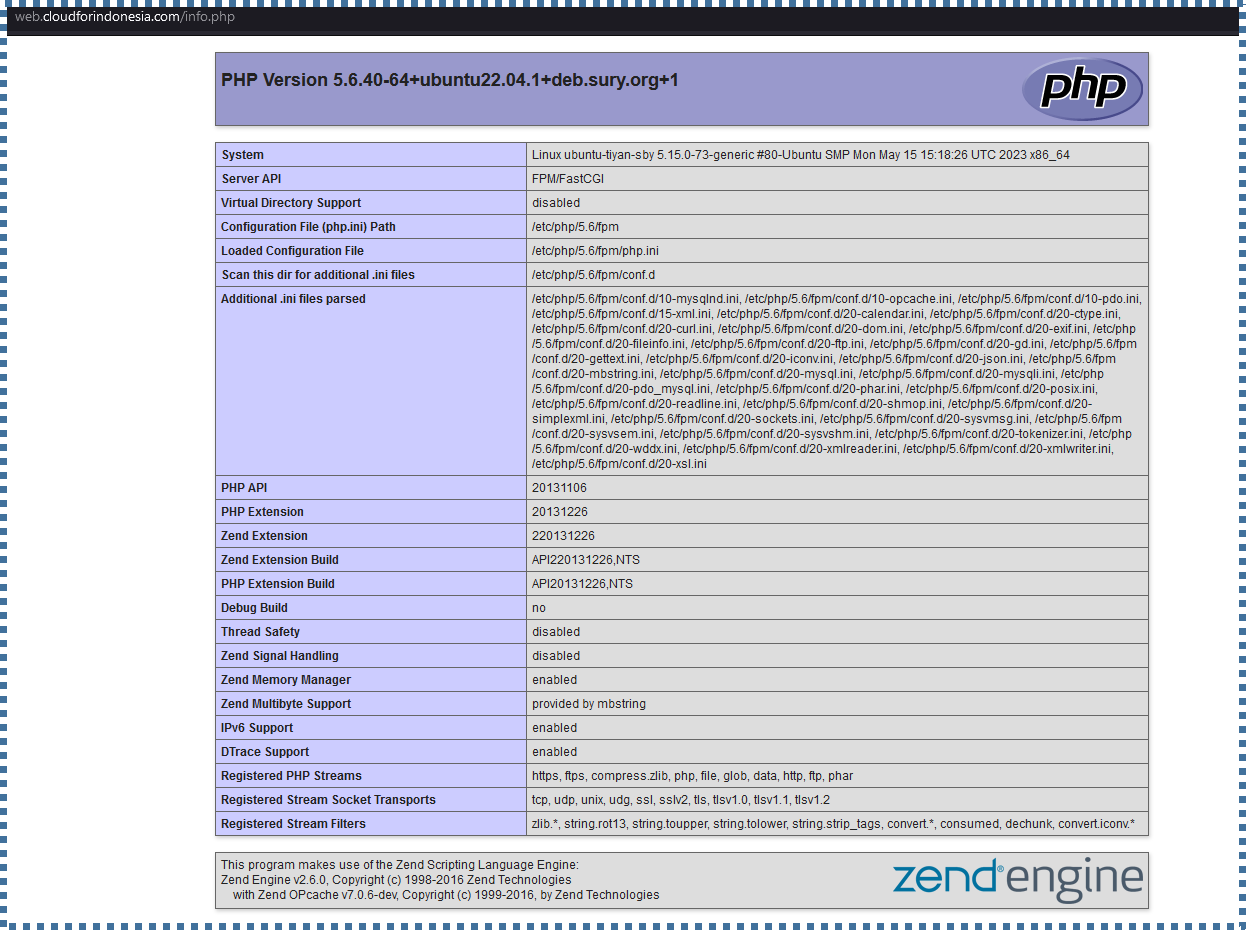
Below is an example of a custom-made website that uses PHP5.6 and still functions.

Configuring the Global Default PHP Version
Within the context of configuring the PHP version in the NGINX block server, you will configure the webserver to use the desired PHP version. This means, that the webserver will only use the decided PHP version configured in that block server. Meanwhile, other operations might still need other PHP versions to function properly.
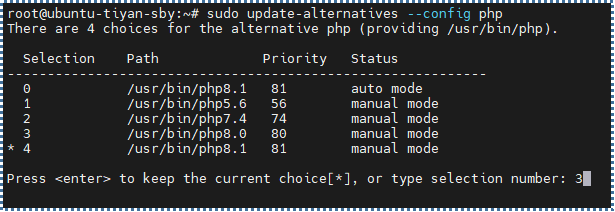
Before, we set up the PHP server for one NGINX web server. Now, we will change the PHP version used by the entire OS with the following command.
# sudo update-alternatives –config php
Decide which PHP version we want to set globally.
To check the PHP version you have set as the global default, use the following command.
# php –version

Conclusion
In this tutorial, we have successfully installed multiple PHP versions in CloudRaya’s VM. By following these steps, now you can run multiple PHP versions in one environment with ease. Hope this tutorial helps you develop and manage your PHP project more flexibly and efficiently.
Visit CloudRaya’s Knowledge Base for more interesting tutorials around cloud computing or visit our YouTube Channel to watch it done directly.