Export and Import Database in MySQL or MariaDB Using Mysqldump
In the RSYNC tutorial, we learned how to back up files and folders on a Linux-based VM. But what if we want to back up a database within our VM?
Let’s say our VM contains a website with a database. How do we back it up and restore it?
In this tutorial, I’ll explain some methods for generating backups on one of the well-known Database Management Systems (DBMS) – MySQL
As we know, data is a crucial asset for any organization. As database administrators, it’s our primary responsibility to ensure data is secure and available. In case of unwanted events like database corruption or data loss, we need to recover it promptly.
Each database platform has its own methods for generating database backups and restores. Many vendors provide solutions like software or hardware to assist in backing up and restoring databases based on our Recovery Time Objective (RTO) and Recovery Point Objective (RPO) needs.
In this tutorial, we won’t discuss any third-party vendors. Instead, we’ll focus on the built-in method used to generate backups from MySQL, which is mysqldump. The topics covered in this tutorial are as follows:
What is Mysqldump?
The name itself is quite definitive, isn’t it? It’s a tool for “dumping” or, in other words, backing up MySQL databases.
Mysqldump is a built-in tool in MySQL, a command-line utility highly recommended for generating logical backups of MySQL databases.
It’s not limited to just MySQL databases; it also works for MariaDB since MariaDB is a replacement for MySQL.
Mysqldump works by creating SQL Statements files (.sql) containing all the command-based requests we specify. These SQL statement files are useful for recreating database objects and data.
Beyond the (.sql) format, we can also generate output in XML, delimited text files, or CSV formats.
Besides serving as a backup, these (.sql) files can also be used to transfer databases to other servers or even to different database applications.
Format of Mysqldump Command
The working principle of mysqldump is quite straightforward, depending on the backup goal we desire.
Backup Command Format
In this first point, let’s explore several commands for backing up databases.
Open the terminal, and make sure you are not logged into MySQL.
▶️ Backup 1 Database
If we have only one database or specifically want to back up one database, the syntax in mysqldump is as follows:
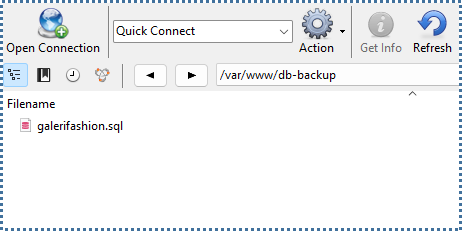
| # mysqldump -u admin -p galerifashion > /var/www/db-backup/galerifashion.sql |

The purpose of this command is:
- Access the database with the name ‘user admin’.
- Mysqldump may ask for the user’s password (
-p). The password value is optional. If not provided in the command, mysqldump will ask for the username’s password after we initiate the command. Alternatively, the password can be written directly into the command using--password=[password_anda]or-p[password_anda] - The database name being backed up is ‘galerifashion’.
- We’ll back up this database into an SQL file named ‘galerifashion.sql’ in the specified folder location.
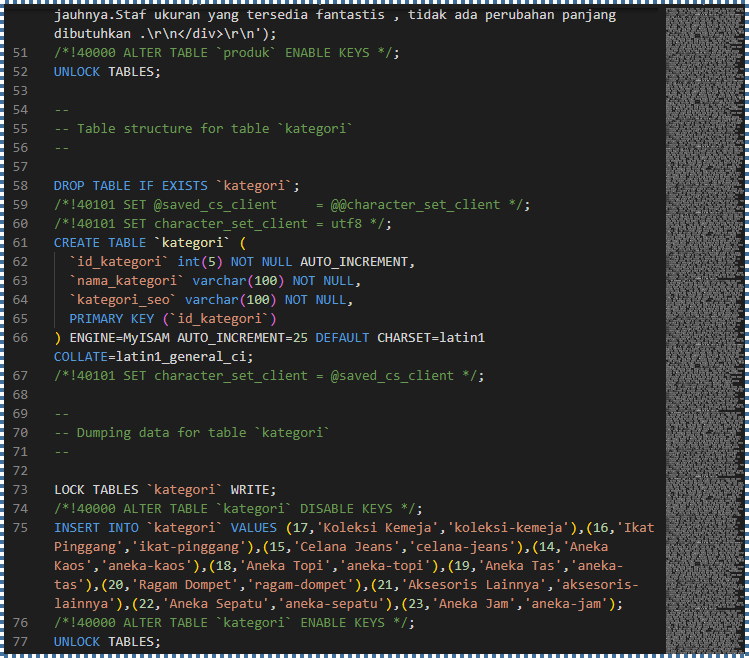
After successfully generating the backup, let’s open the backup file to see the content of this backup file.
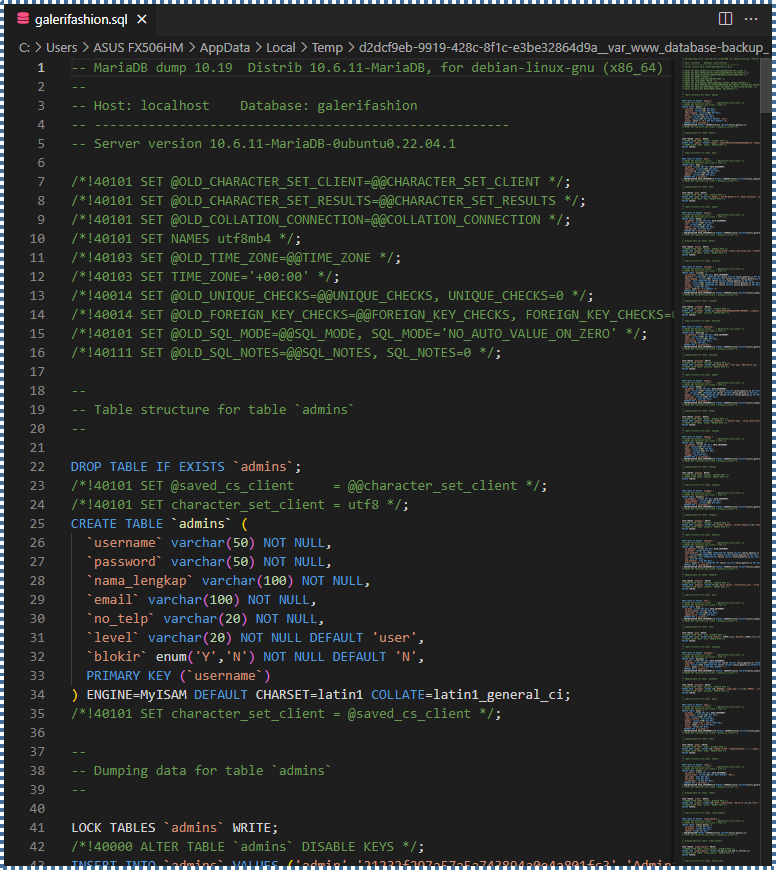
As seen in the image above, the backup file contains numerous SQL statements that can be used to recreate an object.
By default, when restoring the database, you’ll need to create the database first in MySQL (if it doesn’t exist). If you want to restore the database without creating it first, you can add the following command at the beginning of the file:
CREATE DATABASE /!32312 IF NOT EXISTS/ galerifashion /*!40100 DEFAULT CHARACTER SET latin1 COLLATE latin1_swedish_ci */;USE galerifashion; |
▶️ Backup Multiple Databases
Next, suppose we have many databases but only want to back up a few databases. The command we can use is as follows:
| # mysqldump -u admin -p –databases galerifashion cloudforindonesia > /var/www/db-backup/galerifashion_cloudforindonesia.sql |

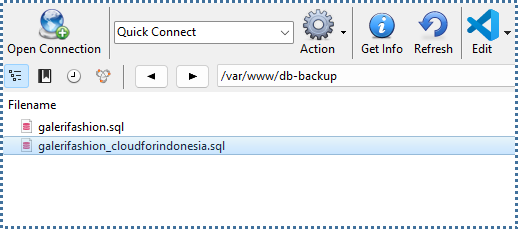
Here, we add optional modifiers –databases, where this option is useful if we want to back up multiple databases into one .sql file.
▶️ Backup Entire Collection of Databases
Then, if we want to back up all databases from our projects into one .sql file, we can use the following command:
| # mysqldump -u admin -p –all-databases > /var/www/db-backup/all_db.sql |

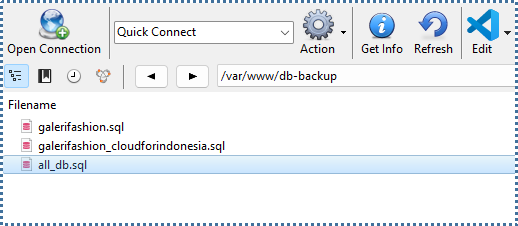
Do you feel something different? If we use the –all-databases option, we don’t need to mention the names of the databases we want to back up.
▶️ Backup Database Structure Only
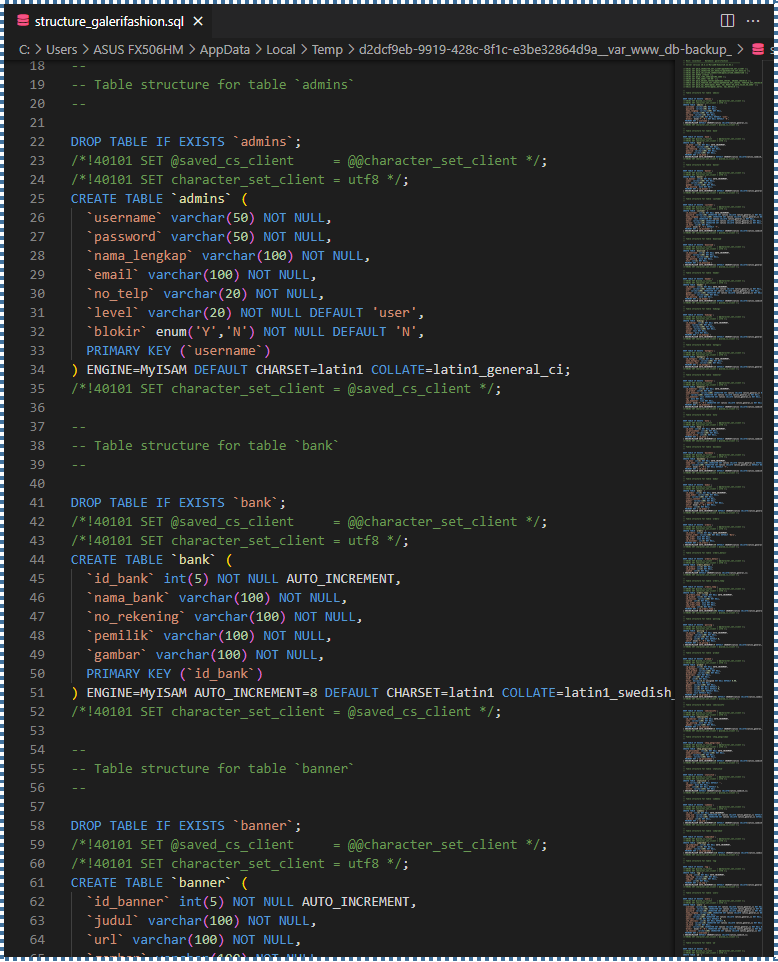
If we want to back up only the database structure (rows, tables, etc.) without its data, we can use the –no-data option. The following command will generate only the database structure:
| # mysqldump -u admin -p –no-data galerifashion > /var/www/db-backup/structure_galerifashion.sql |

▶️ Backup Database Data Only
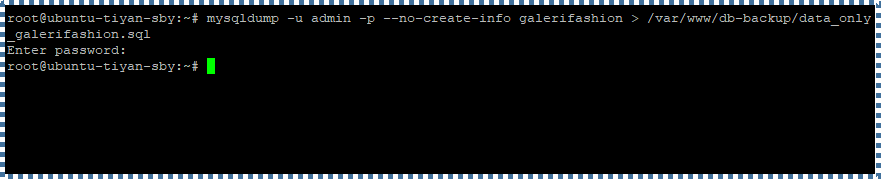
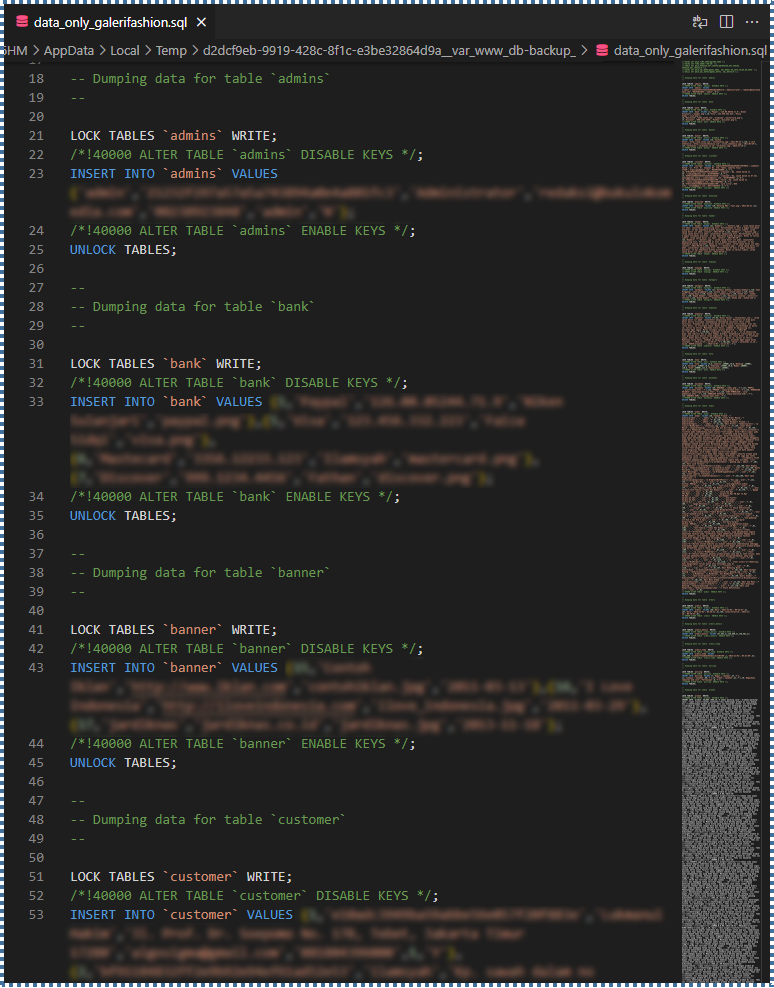
Conversely, if we want to generate only the data without the database structure, we can use the –no-create-info option. The following command will generate only the data:
| # mysqldump -u admin -p –no-create-info galerifashion > /var/www/db-backup/data_only_galerifashion.sql |
▶️ Backup Specific Tables Within a Database
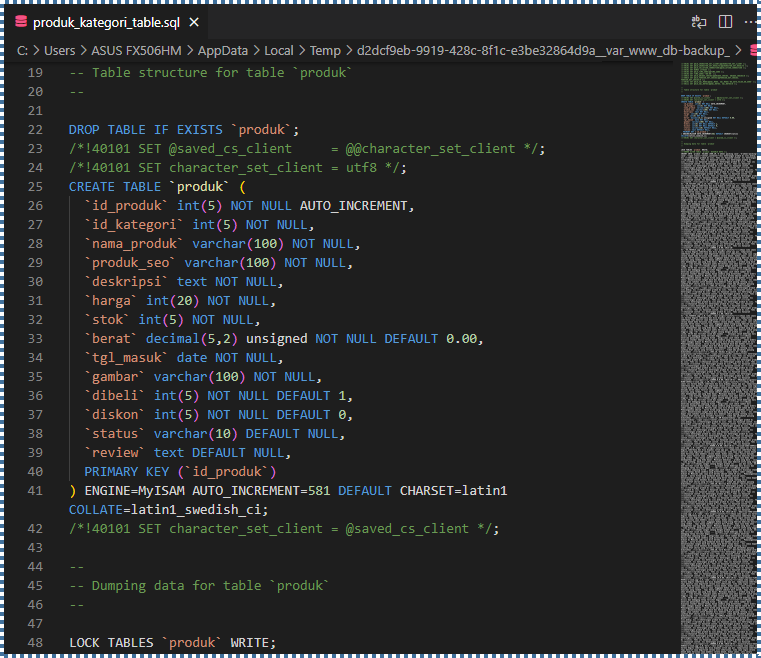
To perform this action, in the command section, specify the table names we want to extract after the database name. An example of its usage is:
| # mysqldump -u admin -p galerifashion produk kategori > /var/www/db-backup/produk_kategori_table.sql |

From all the commands above, if there’s an error during the export process, mysqldump will display it on the screen.
There are many more backup activities we can explore with mysqldump. It depends on the goals we have for our activities.
For a comprehensive explanation of optional modifiers and other features, you can explore the MySQL documentation directly.
Restore Command Format
Okay, after successfully backing up the desired databases, we’ll surely need to restore these databases at some point or if there’s an issue with our project.
Restoring a MySQL database using mysqldump is quite simple. There’s a slight difference in the command used; when restoring the database, we use the “mysql” command instead of the “mysqldump” command.
Let’s see how to restore databases based on the backup activities we previously performed.
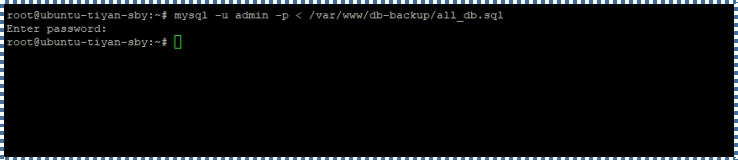
▶️ Restore Database(s) from a Mysqldump File
If you want to restore a mysqldump file, you can use the following command:
| mysql -u admin -p < /var/www/db-backup/all_db.sql |
▶️ Restore One Database from a Mysqldump File
If a mysqldump file contains multiple databases that we backed up and we only want to restore one database, we can use the –one-database option with the following command:
| # mysql -u admin -p –one-database galerifashion < /var/www/db-backup/all_db.sql |

▶️ Restore One Table from a Mysqldump File
If you have multiple databases and accidentally deleted a table in one of the databases and want to restore it, you can follow this method.
Here, we’ll use the SED command because MySQL doesn’t have a native method for this.
# sed -n -e ‘/– Table structure for table `komentar`/,/UNLOCK TABLES/p’ all_db.sql > tabel_komentar.sql |

The purpose of this command is to copy a set of command lines from the file all_db.sql, which ranges from the line -- Table structure for table ` to the end line of UNLOCK TABLES, and extract it into the file tabel_komentar.sql komentar`
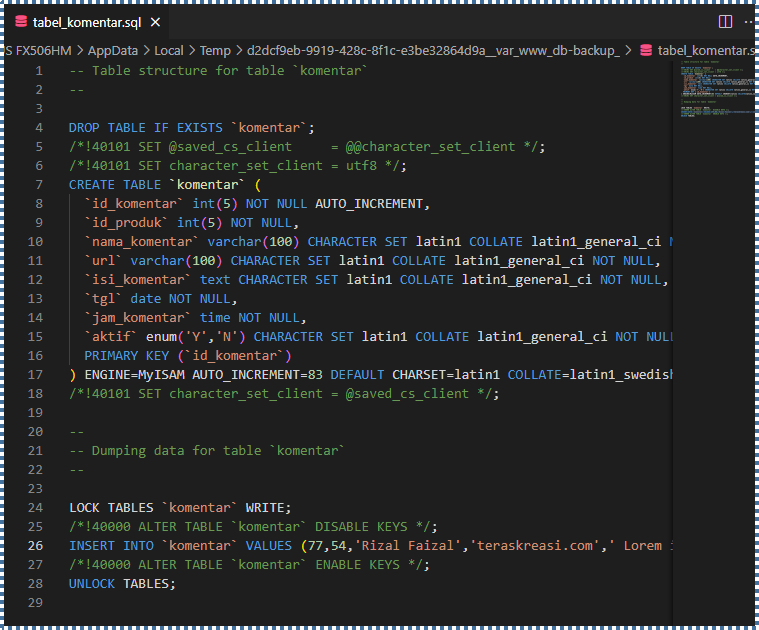
After placing it in tabel_komentar.sql, restore it to the desired database.
| # mysql -u admin -p galerifashion < /var/www/db-backup/tabel_komentar.sql |

Conclusion
The explanations above encompass the usual mysqldump commands used in managing MySQL backups.
It’s relatively easy to use, right? The only issue that arises when restoring databases with mysqldump is that it creates a backup file containing SQL commands necessary to recreate the database. Therefore, when restoring that database, the commands will execute all SQL statements to create tables and insert data. If you have a large database, the restoration process can take a considerable amount of time to complete.
One solution to this is implementing incremental database backups using binary logs or even direct database server replication.
We’ll discuss workarounds for this in the next article.
Visit our knowledge base and blog pages to access articles on various technology topics. kAlternatively, you can explore our Youtube channel for IT tutorial videos.