Products and Features
- Getting Started with CloudRaya Container Registry
- How to use Sudo on a CloudRaya Linux VM
- Keeping Your CloudRaya Linux VMs Up-to-Date
- Maximizing StorageRaya with Essential Practices
- Assign Multiple IP Addresses to Virtual Machine
- Generating a CloudRaya API key
- Simplify CloudRaya Management with API
- Deploying a Virtual Machine on CloudRaya
- Deploying a Kubernetes Cluster on KubeRaya
- Using StorageRaya – CloudRaya S3 Object Storage
- Opening Ping Access on Cloud Raya VM Public IP
- Maximize Your Storage Raya Access Speed with Content Delivery Network (CDN)
- How to Create Project Tag in Cloud Raya for More Organized VM Billing Report
- Exporting Cloud Raya VM to outer Cloud Raya's Infrastructure using Acronis Cyber Protect
- SSO Management on Cloud Raya
- Easy Steps to Enable VPC in Cloud Raya
- Using the SSH key Feature in Cloud Raya Dashboard
- Cloud Raya Load Balancer, Solution to Distribute Load Equally
- Create your own VPN server with DNS-Level AdBlocker using PiVPN
- Fix Broken LetsEncrypt SSL Certificate due to Expired Root CA Certificate
- How to Make a Snapshot and Configure VM Backup in Cloud Raya
- How to Request Services or Licenses Products
- Adding, Attaching, and Resize Root Storage Disk in Cloud Raya VPS
- Managing your DNS Zone with DNS Bucket in Cloud Raya
- Create VM, Custom Package, Reinstall VM, and Adjusting Security Profile
- How to backup Linux VM via Acronis in Cloud Raya
- How to Backup Desktop Linux and Windows via Acronis in Cloud Raya
- Backing-Up Cloud Raya Windows VM Using Acronis Cyber Protect
- Load Balancing in Cloud Raya
- Establishing a VPN in Cloud Raya
- Generating an API Token
- Deploying a Virtual Machine in Cloud Raya
- Show Remaining Articles ( 17 ) Collapse Articles
- How to backup Linux VM via Acronis in Cloud Raya
- How to Backup Desktop Linux and Windows via Acronis in Cloud Raya
- Maximizing StorageRaya with Essential Practices
- Using StorageRaya – CloudRaya S3 Object Storage
- Building a Static Website Using Storage Raya S3 Bucket
- Integrating S3 Storage Raya and Strapi for Asset Storage Optimization – Part 4
- Maximize Your Storage Raya Access Speed with Content Delivery Network (CDN)
- Managing Storage Raya from various tools and from various OS
- Binding NextCloud with CloudRaya S3 Object Storage as External Storage Mount
- How to use Sudo on a CloudRaya Linux VM
- Keeping Your CloudRaya Linux VMs Up-to-Date
- Implement Multi-Factor Authentication on CloudRaya Linux VM
- Assign Multiple IP Addresses to Virtual Machine
- Deploying a Virtual Machine on CloudRaya
- Configurating cPanel Using Ubuntu 20.04 on CloudRaya – Part 2
- Deploying cPanel Using Ubuntu 20.04 on CloudRaya - Part 1
- Exporting Cloud Raya VM to outer Cloud Raya's Infrastructure using Acronis Cyber Protect
- Using the SSH key Feature in Cloud Raya Dashboard
- Adding, Attaching, and Resize Root Storage Disk in Cloud Raya VPS
- Create VM, Custom Package, Reinstall VM, and Adjusting Security Profile
- How to backup Linux VM via Acronis in Cloud Raya
- Backing-Up Cloud Raya Windows VM Using Acronis Cyber Protect
- Deploying a Virtual Machine in Cloud Raya
Integration
- Implement Multi-Factor Authentication on CloudRaya Linux VM
- Accessing KubeRaya Cluster Using the Kubernetes Dashboard
- Building a Static Website Using Storage Raya S3 Bucket
- Integrating S3 Storage Raya and Strapi for Asset Storage Optimization – Part 4
- Integrating Strapi Content to Frontend React - Part 3
- Content Management with Strapi Headless CMS - Part 2
- Strapi Headless CMS Installation in CloudRaya - Part. 1
- Using SSH Key on CloudRaya VM with PuTTY
- Installing Multiple PHP Versions in One VM for More Flexible Web Development
- Replatforming Apps to K8s with RKE and GitLab CI
- OpenAI API Integration: Completions in PHP
- Building an Email Server on CloudRaya Using iRedMail
- Improving Email Delivery with Sendinblue SMTP Relay
- Building a Self Hosted Password Manager Using Passbolt
- How to Install Podman on Almalinux/Rocky Linux 9
- ElkarBackup: GUI Based backup Tools based on Rsync and Rsnapshot
- Improving Webserver Performance with SSL Termination on NGINX Load Balancer
- Using NGINX as an HTTP Load Balancer
- Automating Task with Cronjob
- Upgrade Zimbra and the OS Version
- Deploy Mailu on Rancher Kubernetes
- Export and Import Database in MySQL or MariaDB Using Mysqldump
- Backup & Sync Local and Remote Directories Using RSYNC
- Managing Storage Raya from various tools and from various OS
- Binding NextCloud with CloudRaya S3 Object Storage as External Storage Mount
- Simple monitoring and alerting with Monit on Ubuntu 22.04 LTS
- VS Code on your browser! How to install code-server on a VM
- Implementing Redis HA and Auto-Failover on Cloud Raya
- Using XFCE Desktop Environment on Cloud Raya VM
- Installing Python 3.7-3.9 on Ubuntu 22.04 Jammy LTS using PPA
- Implementing Continuous Integration with Gitlab CI and Continuous Delivery with Rancher Fleet
- Using Collabora Online on Cloud Raya NextCloud's VM
- Installing NextCloud in Cloud Raya- Detail Steps from the Beginning to the Very End
- Set Up High Availability PostgreSQL Cluster Using Patroni on Cloud Raya
- Set Up WAF KEMP in Cloud Raya Part 2
- Set Up WAF KEMP in Cloud Raya Part 1
- Using the SSH key Feature in Cloud Raya Dashboard
- Monitor Your Services Uptime Using Uptime Kuma
- Hosting Static Website with Hugo on Cloud Raya
- Kubernetes Ingress Controller using SSL in CloudRaya
- Reverse Proxy management using Nginx Proxy Manager
- Create your own VPN server with DNS-Level AdBlocker using PiVPN
- How to deploy Portainer on Linux to easily manage your docker containers
- High Availability Kubernetes Using RKE in Cloud Raya Part 3
- High Availability Kubernetes Using RKE in Cloud Raya Part 2
- High Availability Kubernetes Using RKE in Cloud Raya Part 1
- How to backup Linux VM via Acronis in Cloud Raya
- How to Backup Desktop Linux and Windows via Acronis in Cloud Raya
- Deploying Magento on Cloud Raya
- How to Install Nextcloud on Cloud Raya
- How to Install CWP in Cloud Raya
- How to Install Node.js and Launch Your First Node App
- How to install and secure MariaDB on Ubuntu 18.04 and 20.04 on Cloud Raya
- How to Install and Securing MongoDB on Ubuntu 18.04 and 20.04
- Classes: Post Installation on Ansible
- Classes: Install and Configure Ansible
- Classes: Introduction to Ansible for a robust Configuration Management
- How to Setup Active Directory Domain Service & DNS with Cloud Raya
- How to Host Your Own Docker Hub in Cloud Raya
- How to Setup Your Own Laravel with Nginx in Ubuntu 18.04
- How to Deploy Container in Cloud Raya using Docker
- Securing CentOS with iptables
- Install and Configure Squid Proxy in Ubuntu
- Installing Apache and Tomcat: A Quick Way
- Securing Ubuntu with UFW
- Install a Node.js and Launch a Node App on Ubuntu 18.04
- Installing LAMP in Ubuntu
- Installing LEMP Stack on Ubuntu 18.04
- Show Remaining Articles ( 53 ) Collapse Articles
- Articles coming soon
- Implement Multi-Factor Authentication on CloudRaya Linux VM
- Configurating cPanel Using Ubuntu 20.04 on CloudRaya – Part 2
- Deploying cPanel Using Ubuntu 20.04 on CloudRaya - Part 1
- Integrating S3 Storage Raya and Strapi for Asset Storage Optimization – Part 4
- Integrating Strapi Content to Frontend React - Part 3
- Content Management with Strapi Headless CMS - Part 2
- Strapi Headless CMS Installation in CloudRaya - Part. 1
- Using SSH Key on CloudRaya VM with PuTTY
- Building an Email Server on CloudRaya Using iRedMail
- Improving Email Delivery with Sendinblue SMTP Relay
- Building a Self Hosted Password Manager Using Passbolt
- ElkarBackup: GUI Based backup Tools based on Rsync and Rsnapshot
- Improving Webserver Performance with SSL Termination on NGINX Load Balancer
- Using NGINX as an HTTP Load Balancer
- Upgrade Zimbra and the OS Version
- Deploy Mailu on Rancher Kubernetes
- Managing Storage Raya from various tools and from various OS
- Binding NextCloud with CloudRaya S3 Object Storage as External Storage Mount
- Simple monitoring and alerting with Monit on Ubuntu 22.04 LTS
- VS Code on your browser! How to install code-server on a VM
- Implementing Redis HA and Auto-Failover on Cloud Raya
- Using XFCE Desktop Environment on Cloud Raya VM
- Implementing Continuous Integration with Gitlab CI and Continuous Delivery with Rancher Fleet
- Using Collabora Online on Cloud Raya NextCloud's VM
- Installing NextCloud in Cloud Raya- Detail Steps from the Beginning to the Very End
- Set Up WAF KEMP in Cloud Raya Part 2
- Set Up WAF KEMP in Cloud Raya Part 1
- Monitor Your Services Uptime Using Uptime Kuma
- Create your own VPN server with DNS-Level AdBlocker using PiVPN
- How to deploy Portainer on Linux to easily manage your docker containers
- High Availability Kubernetes Using RKE in Cloud Raya Part 3
- High Availability Kubernetes Using RKE in Cloud Raya Part 2
- High Availability Kubernetes Using RKE in Cloud Raya Part 1
- How to Install Nextcloud on Cloud Raya
- Classes: Post Installation on Ansible
- Classes: Install and Configure Ansible
- Classes: Introduction to Ansible for a robust Configuration Management
- Connect Windows Active Directory on Cloud Raya with Azure AD
- How to Host Your Own Docker Hub in Cloud Raya
- How to Deploy Container in Cloud Raya using Docker
- Show Remaining Articles ( 25 ) Collapse Articles
- Accessing KubeRaya Cluster Using the Kubernetes Dashboard
- Integrating S3 Storage Raya and Strapi for Asset Storage Optimization – Part 4
- Integrating Strapi Content to Frontend React - Part 3
- Content Management with Strapi Headless CMS - Part 2
- Strapi Headless CMS Installation in CloudRaya - Part. 1
- Creating Interactive Chatbot with OpenAI API in PHP
- Installing Multiple PHP Versions in One VM for More Flexible Web Development
- OpenAI API Integration: Completions in PHP
- Improving Webserver Performance with SSL Termination on NGINX Load Balancer
- Using NGINX as an HTTP Load Balancer
- Automating Task with Cronjob
- How to Deploy Django App on Cloud Raya VM Using Gunicorn, Supervisor, and Nginx
- How to Install Node.js and Launch Your First Node App
- How to Setup Your Own Laravel with Nginx in Ubuntu 18.04
- Install a Node.js and Launch a Node App on Ubuntu 18.04
- How to use Sudo on a CloudRaya Linux VM
- Keeping Your CloudRaya Linux VMs Up-to-Date
- Implement Multi-Factor Authentication on CloudRaya Linux VM
- Using SSH Key on CloudRaya VM with PuTTY
- Building a Self Hosted Password Manager Using Passbolt
- Improving Webserver Performance with SSL Termination on NGINX Load Balancer
- Export and Import Database in MySQL or MariaDB Using Mysqldump
- Backup & Sync Local and Remote Directories Using RSYNC
- How to Deploy Django App on Cloud Raya VM Using Gunicorn, Supervisor, and Nginx
- Set Up WAF KEMP in Cloud Raya Part 2
- Set Up WAF KEMP in Cloud Raya Part 1
- Using the SSH key Feature in Cloud Raya Dashboard
- How to backup Linux VM via Acronis in Cloud Raya
- How to Backup Desktop Linux and Windows via Acronis in Cloud Raya
- Securing CentOS with iptables
- Securing Ubuntu with UFW
- Show Remaining Articles ( 1 ) Collapse Articles
- Configurating cPanel Using Ubuntu 20.04 on CloudRaya – Part 2
- Deploying cPanel Using Ubuntu 20.04 on CloudRaya - Part 1
- Integrating S3 Storage Raya and Strapi for Asset Storage Optimization – Part 4
- Integrating Strapi Content to Frontend React - Part 3
- Content Management with Strapi Headless CMS - Part 2
- Strapi Headless CMS Installation in CloudRaya - Part. 1
- Creating Interactive Chatbot with OpenAI API in PHP
- Installing Multiple PHP Versions in One VM for More Flexible Web Development
- Building an Email Server on CloudRaya Using iRedMail
- Building a Self Hosted Password Manager Using Passbolt
- Improving Webserver Performance with SSL Termination on NGINX Load Balancer
- Using NGINX as an HTTP Load Balancer
- Installing Python 3.7-3.9 on Ubuntu 22.04 Jammy LTS using PPA
- Reverse Proxy management using Nginx Proxy Manager
- Install and Configure Squid Proxy in Ubuntu
- Installing Apache and Tomcat: A Quick Way
- Installing LAMP in Ubuntu
- Installing LEMP Stack on Ubuntu 18.04
- Show Remaining Articles ( 3 ) Collapse Articles
- Building a Static Website Using Storage Raya S3 Bucket
- Integrating S3 Storage Raya and Strapi for Asset Storage Optimization – Part 4
- Integrating Strapi Content to Frontend React - Part 3
- Content Management with Strapi Headless CMS - Part 2
- Strapi Headless CMS Installation in CloudRaya - Part. 1
- Creating Interactive Chatbot with OpenAI API in PHP
- Installing Multiple PHP Versions in One VM for More Flexible Web Development
- OpenAI API Integration: Completions in PHP
- Hosting Static Website with Hugo on Cloud Raya
- Deploying Magento on Cloud Raya
- How to Install CWP in Cloud Raya
- How to Setup Active Directory Domain Service & DNS with Cloud Raya
- Articles coming soon
Strapi Headless CMS Installation in CloudRaya – Part. 1
Expanding the CMS (Content Management System) in today’s highly developing web environment becomes a critical issue. The appearance of new approaches to CMS, such as headless CMS, offers better solutions for modern web development compared to the traditional CMS.
The Challange of Traditional CMS
Today, users of traditional CMS, such as WordPress, may face several challenges. While traditional CMS offers advantages in content management and how it looks, it has presence disadvantages such as complex maintenance and the need for regular updates.
For example, when traditional CMS requires an update, users also need to pay attention to plug-ins, themes, PHP compatibility, etc. On the other hand, if the CMS is not updated to the newest version, it has the potential to endanger the website.
In this context, high IT understanding and knowledge are required to ensure compatibility with plug-ins, themes, and other elements of the website. These high requirements to maintain the website may cost significant time and energy to accomplish.
The Rise of Headless CMS Concept as a Solution
The rise of headless CMS provides more flexible and efficient solution than the traditional CMS. Here are some points you might want to know about headless CMS:
Separation of Backend and Frontend: Headless CMS separates the back end (content management) and the front end (user interface). Thus, the focus becomes content management without interfering with the user interface.
The front-end part of the website can be developed separately. On the other hand, data can be accessed by the front end through the Application Programming Interface (API). That is why, CMS is often used by developers to quickly create an API.Freedom to Choose Frontend Technology: Headless CMS allows us to have the freedom to choose which technology we want to use, such as React, Angular, or Vue.js. The result is a unique user experience according to your business goal.
Scalability and Expansion: Headless CMS allows us to easily integrate content to multiple platforms and devices, such as mobile, website, etc. It provides flexibility in developing and expanding our business digital reach.
Performance and Security Optimization: WordPress with many plug-ins installed can experience performance issues that can harm user experience. Strapi, as a headless CMS, provides higher security and performance by reducing the backend load and improving the page load.
In this tutorial, we will build a headless CMS using Strapi in CloudRaya’s VM to fill the need for more modern, flexible, and safe content management.
About Strapi
Strapi is a CMS open-source with headless architecture.
- 100% built with JavaScript and fully customizable.
- Fully supports RESTful and GraphQL, offering users high flexibility on how to interact with the CMS and data access.
- Compatible with PostgreSQL, MySQL, MariaDB, and SQLite databases.
- Strapi can be run as self-hosted or as cloud-based provided by Strapi.
Pre-Instalation
The following is the requirement you need to install Strapi in our VM based on the Strapi documentation:
- VM Specification (CPU, RAM, Storage)
- CPU: 2+ cores (recommended), minimum 1 core
- RAM: 4GB+ (recommended), minimum 2GB
- Storage: 32GB+ (recommended), minimum 8GB
- Node.js
- Node.js v18.x is recommended for Strapi v4.3.9 and up. → The tutorial will use this version
- Node.js v16.x is recommended for Strapi v4.0.x to v4.3.8.
- LTS Node.js version has also included the NPM.
- Supported Database
- MySQL: 8.0 (recommended), minimum 5.7.8
- MariaDB: 10.6 (recommended), minimum 10.3 → The tutorial will use this version
- PostgreSQL: 14.0 (recommended), minimum 11.0
- SQLite: versi 3 (recommended and minimum)
- Supported OS
- Ubuntu (LTS): 22.04 (recommended), minimum 20.04 → The tutorial will use this version
- Debian: 11.x (recommended), minimum 10.x
- CentOS/RHEL: 9.x (recommended), minimum 8.x
- Windows Server: version 2022 (recommended), minimum 2019
- Open port TCP 1337 in ACL firewall in the VPC profile.
You can find about how to add port in CloudRaya's VPC to the following KB.
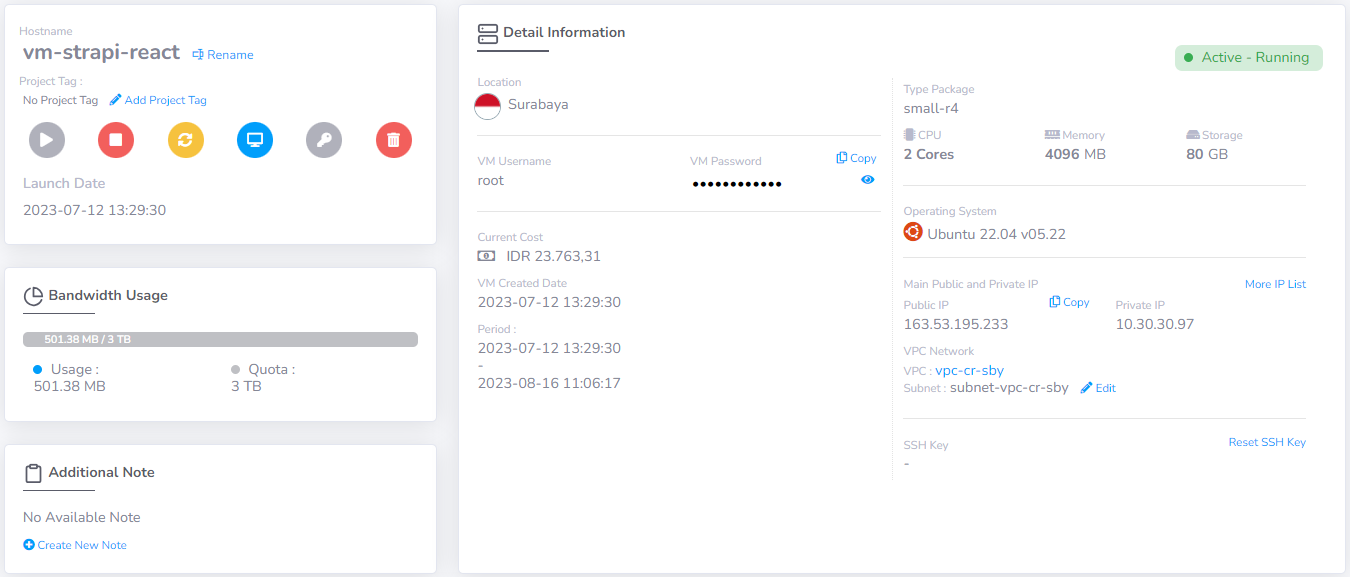
CloudRaya's Virtual Machine
We will use the following VM specification for this tutorial:
Node.js Installation
As Strapi code is written in JavaScript, you need to install Node.js with the npm package manager.
Node.js is a runtime environment used to run server-side JavaScript, while npm is the standard package manager for Node.js. npm provides a public repository filled with thousands of software packages developed by the Node.js community.
Add Node.js repository to our VM with the following command:
curl -sL https://deb.nodesource.com/setup_18.x | sudo -E bash -
Run the following command to install Node.js and npm after the download process is finished:
sudo apt-get install nodejs -y
Truth be told, Strapi has provided installation script you can use with the following command:
npx create-strapi-app@latest my-project --quickstart
If you decide to use the script, Strapi will use SQLite as the database as default. Meanwhile, we will use MariaDB as the database in this tutorial.
That is why, the next step to do is to install MariaDB in the VM.
MariaDB Installation
Install MariaDB in Ubuntu
sudo apt install mariadb-server -y
Run the following command to make sure that MariaDB is running every time the system is activated:
sudo systemctl enable mariadb
Create Database and User for Strapi
Login to MariaDB:
sudo mariadb -u root
Create the database for Strapi. This tutorial will named it “strapi_db” for ease of explanation. You can change it to whatever name based on what you need:
CREATE DATABASE strapi_db;
Next, create ‘admin‘ user and the passwords for the database. You can change it to suit your need:
CREATE USER 'admin'@'localhost' IDENTIFIED BY 'password-anda';
Give full access right in all of the “strapi_db” database table to ‘admin‘:
GRANT ALL PRIVILEGES ON strapi_db.* TO 'admin'@'localhost';
Apply the recent changes and exit MariaDB:
					FLUSH PRIVILEGES;
EXIT;
Strapi Installation
Now we can begin with Strapi Installation. We will refer to the previous installation command, but without the --quickstart.
					npx create-strapi-app@latest backend-strapi
# npx running the npm package command.
# create-strapi-app is the Strapi package.
# @latest is to show that we used the latest version of Strapi.
# backend-strapi is the name of our Strapi project.
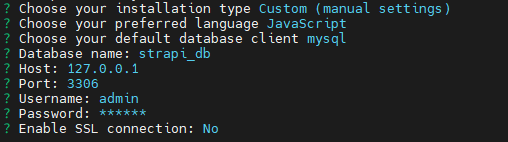
- In the installation type, choose
Custom (manual settings). - In the preferred language, choose
JavaScript. - In the
default database clientconfiguration, choose MySQL database and insert the database name, user, and passwords: - In
Enable SSL connection, if it will not be accessible for the public, you can chooseNo
Wait for the installation process to finish. The following table will appear if it is finished.

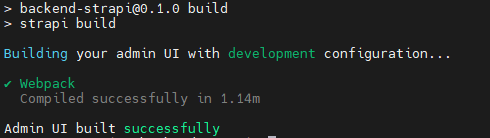
Now, we create the Strapi admin panel by getting into the Strapi installation directory:
					cd /root/backend-strapi/
npm run build
Wait for a moment until the process is finished. The following message will appear when it is done:
Running the Strapi Service
Run the following command to start Strapi. Make sure you always run this command after you boot up your VM from the shutdown condition.
					cd /root/backend-strapi/
npm run develop
The following message will appear:
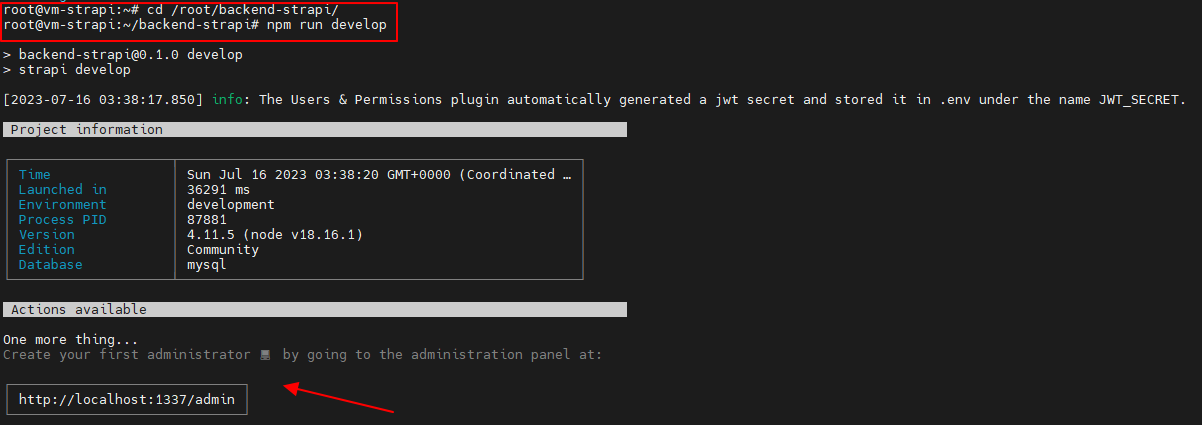
Let’s start with creating user admin for the Strapi. Open your browser and visit http://localhost:1337/admin. However, since we install Strapi in CloudRaya’s VM, you can access it through CloudRaya public IP at http://163.53.195.233:1337/admin.
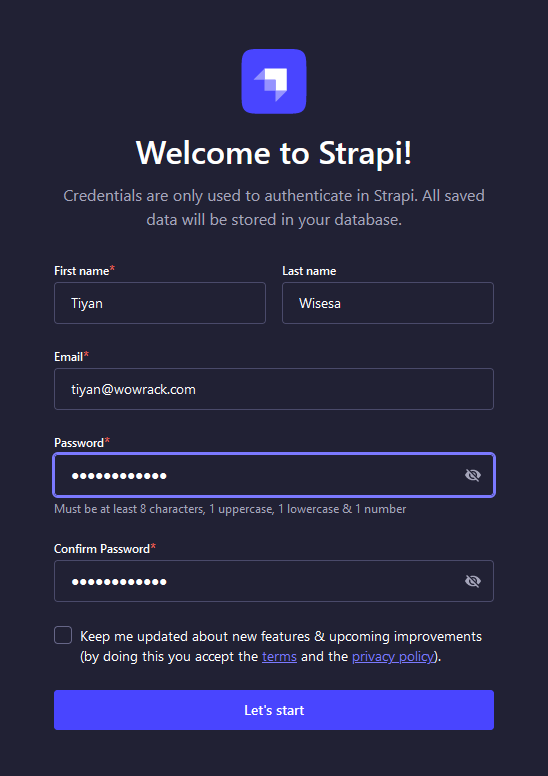
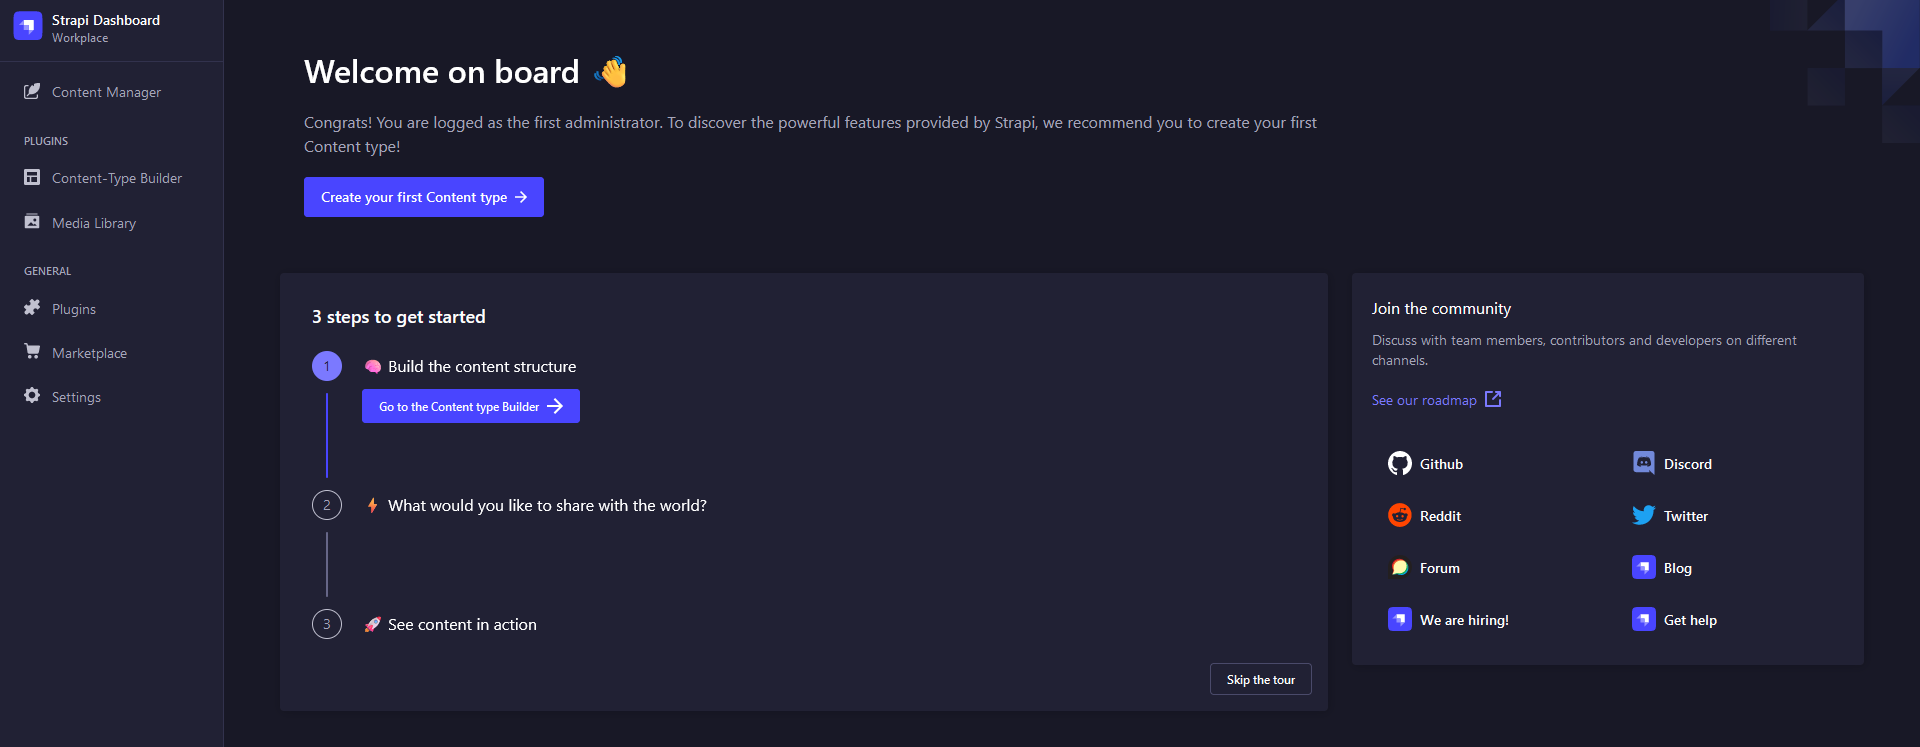
You will then be redirected to the Strapi admin panel. Here, you can start managing our content and configure the application according to your needs.
Strapi Extensions
Strapi provides additional plug-in from their ‘Marketplace’ to help you increase your productivity and ease of content management.

Conclusion
We have learned together about the challenges of traditional CMS and the solutions offered by headless CMS, particularly with Strapi.
We have also learned about how to install Strapi in CloudRaya VM and that is the end of this tutorial.
Do not worry, this is the first tutorial about Strapi, and there is more to come. We will discuss many things that Strapi and CloudRaya can do, such as managing backend, creating frontend with React, etc. See you in the next tutorial!